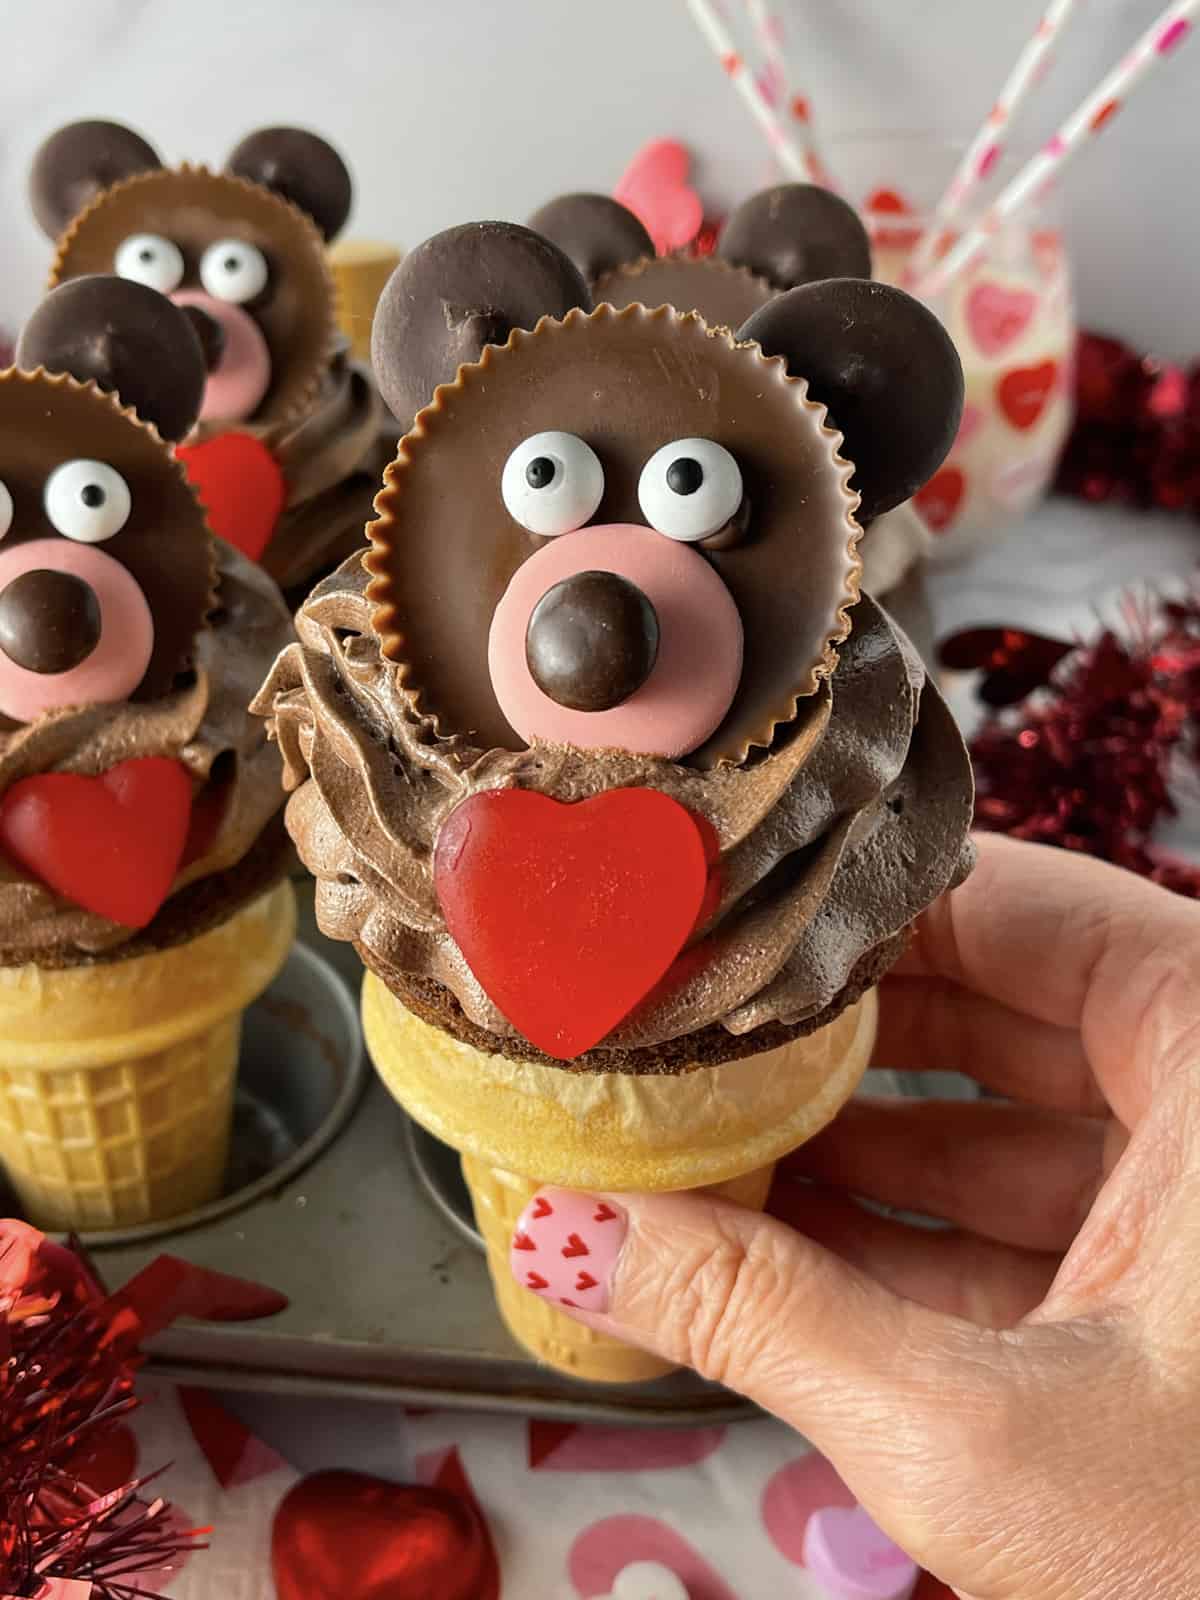
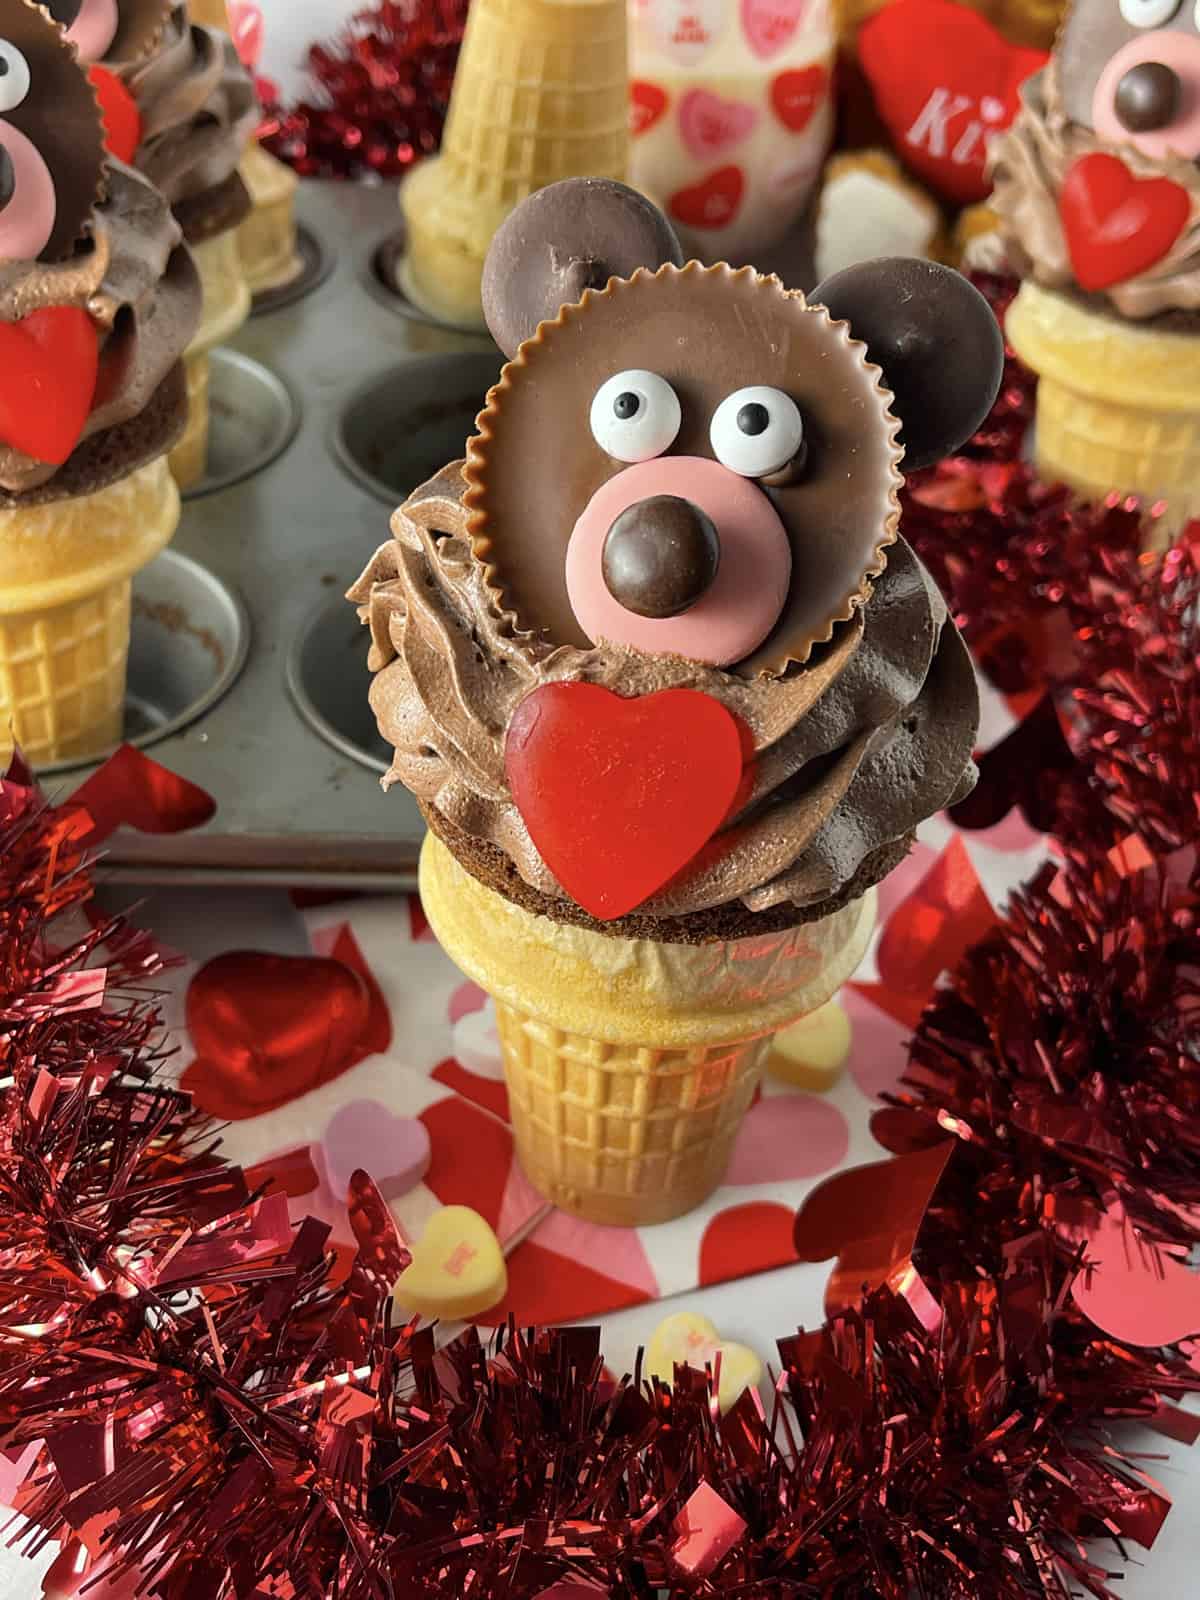
Valentine Teddy Bear Cupcakes are so cute and simple to make with cake batter baked right into an ice cream cone. Your sweetheart will love them and kids will love them too. This cute cupcake idea is great for class parties.
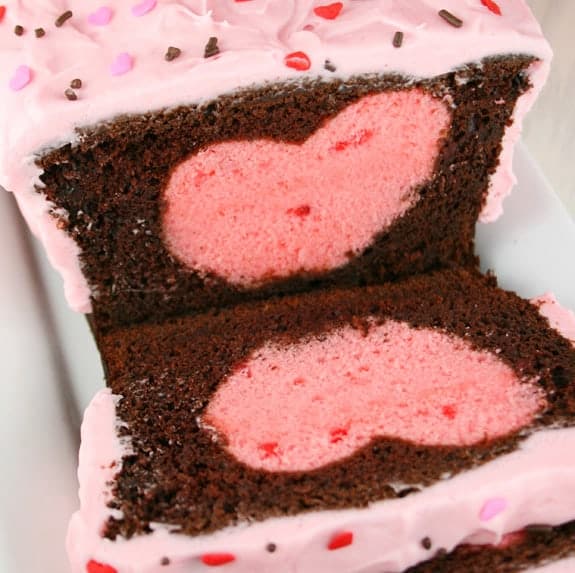
Looking for more festive Valentine's Day cupcakes? These are so delicious: Easy Strawberry Buttercream Cupcakes! Or you could make this adorable Chocolate Covered Strawberry Heart Cake for your sweetie. It has a hidden heart when you cut into it.
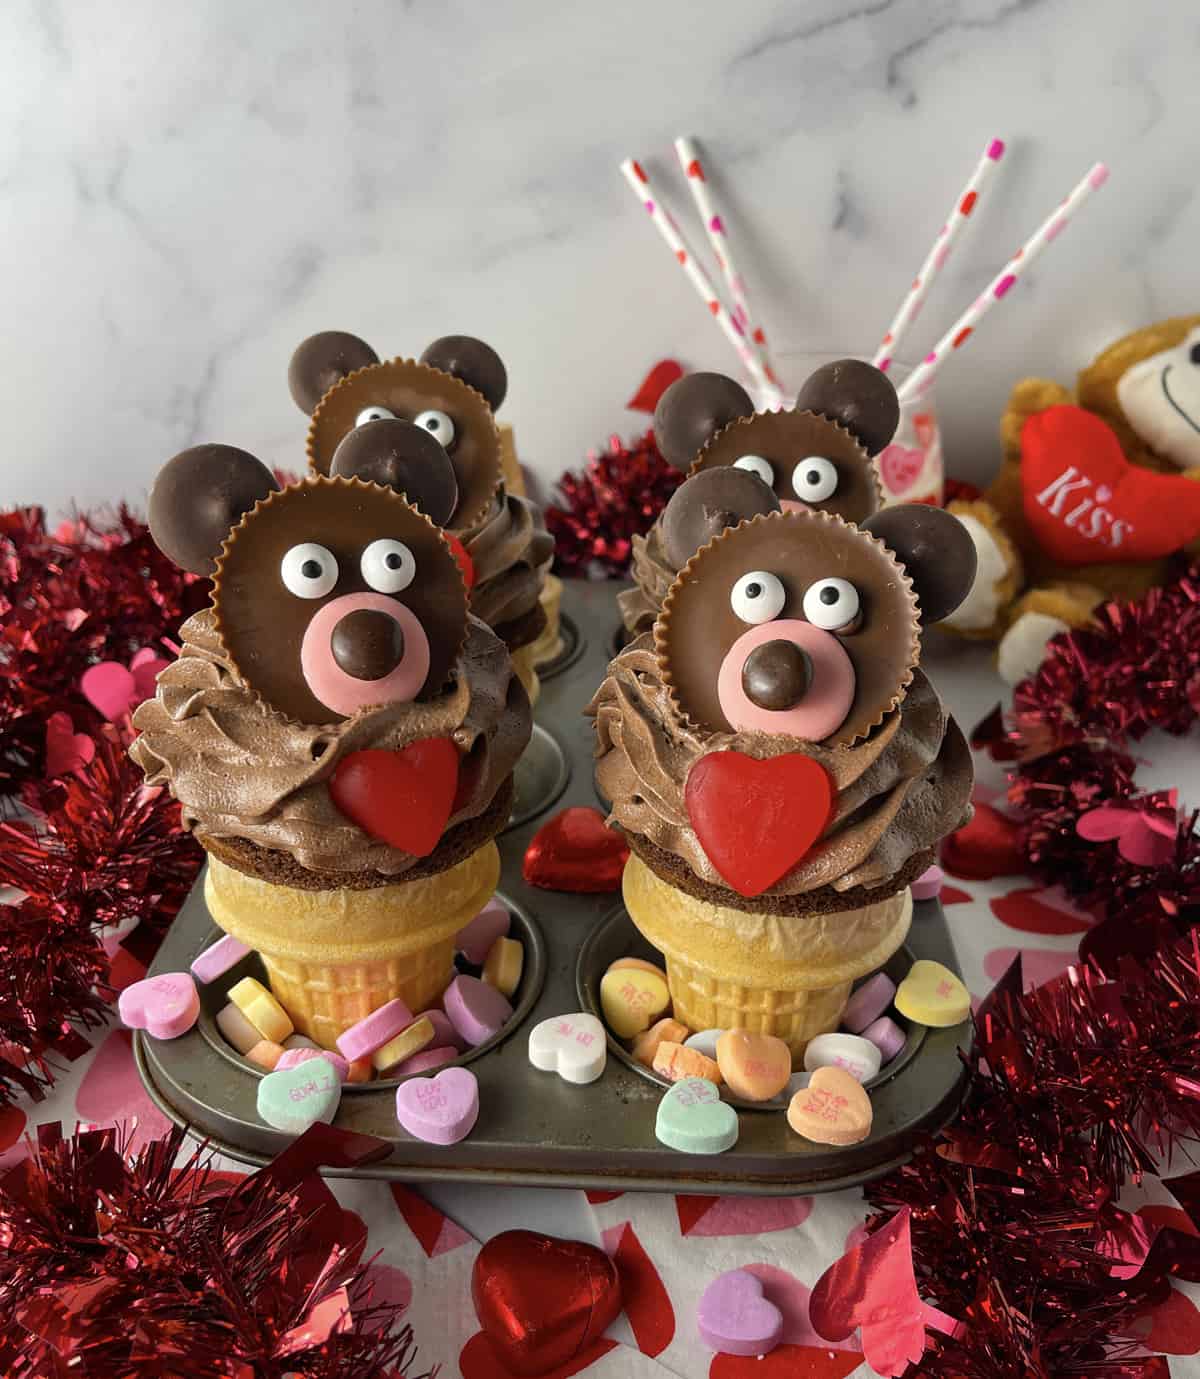
Why I love these Valentine bear cupcakes
• They're a little bit more fun than traditional cupcakes or regular cupcakes. Not your typical chocolate cupcakes!
• Impress your Valentine with these adorable bear cupcakes that are also completely delicious.
• The super cute bear face made out of peanut butter Reese's cup is my absolute favorite part!
• These adorable teddy bear cupcakes are the perfect Valentine's day treat! So much fun!
What you need
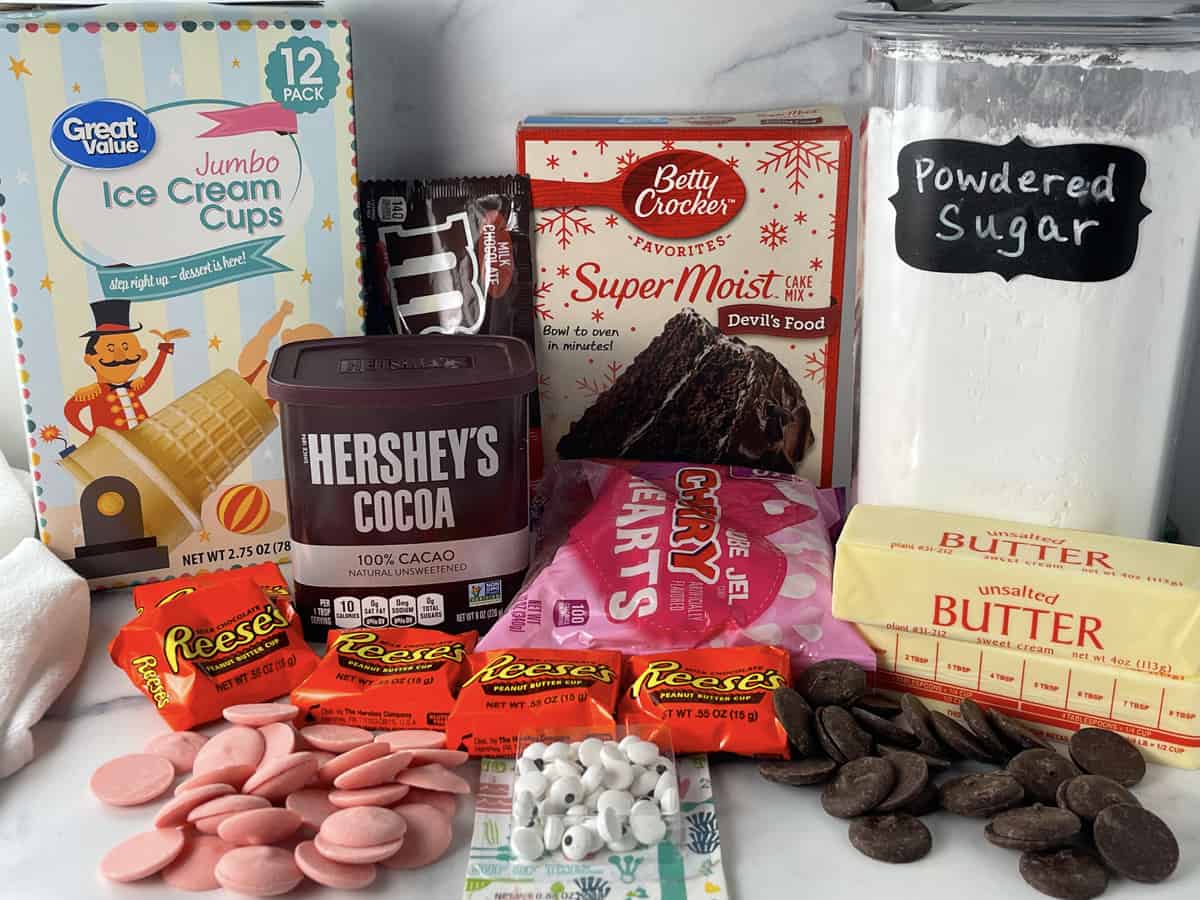
Ingredient notes
• Ice Cream Cones - Use your favorite brand but make sure they are the cake cones (not the sugar cones or waffle cones).
• Cake Mix - We used a chocolate cake mix for this recipe, but you could use any kind of boxed cake mix you like such as yellow, white, red velvet or funfetti. Red velvet cupcakes would be super cute!
• Red Heart Candies - We used the Brach's Cherry Heart Jelly Candies and cut them in half lengthwise so they wouldn't be so heavy when placing on the side of the cupcake. If you can't find them, use any red or pink candy heart that you can find. You could even use a small heart shaped sprinkle. Valentine sprinkles are in the stores now. Check Walmart or your local craft store.
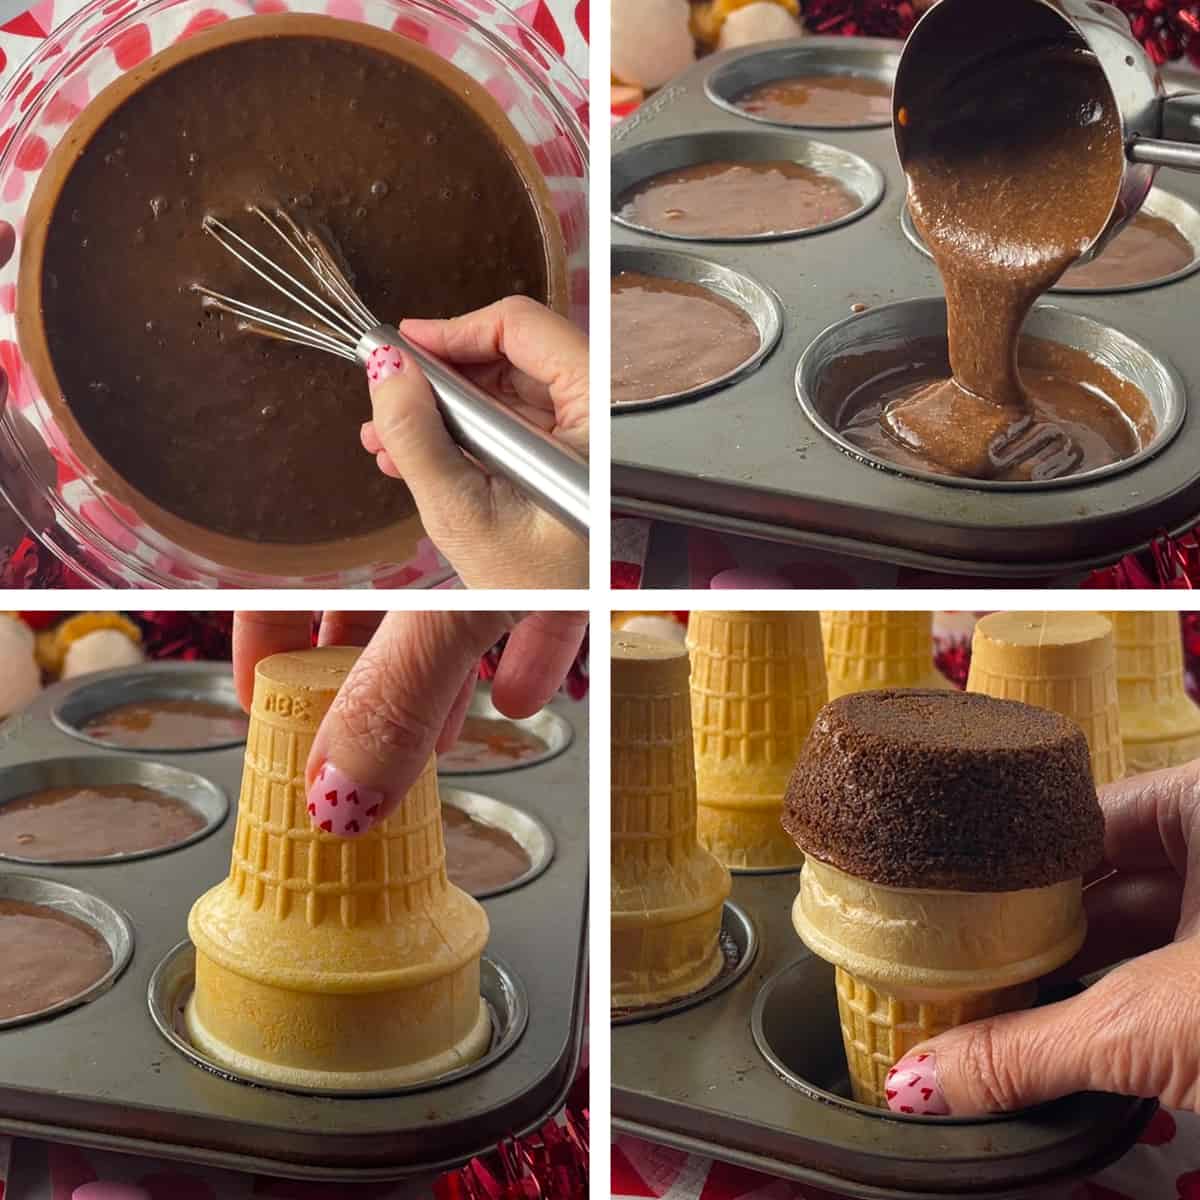
How to make Valentine's Day Bear Cupcakes
- In a large mixing bowl, mix up the cake batter with an electric mixer according to package instructions.
- Use a muffin scoop to scoop prepared batter into greased muffin tins or cupcake pans. (You don't even need cupcake liners.) Make sure you don't over-fill them. You only need to fill the muffin cup ⅔ full.
- Add an upside down ice cream cone on top of the batter in each muffin cup. Make sure they're placed straight and press them slightly into the batter.
- Bake cupcakes at 350°F for 20-22 minutes or until toothpick inserted in middle comes out clean. Let cool on wire rack.
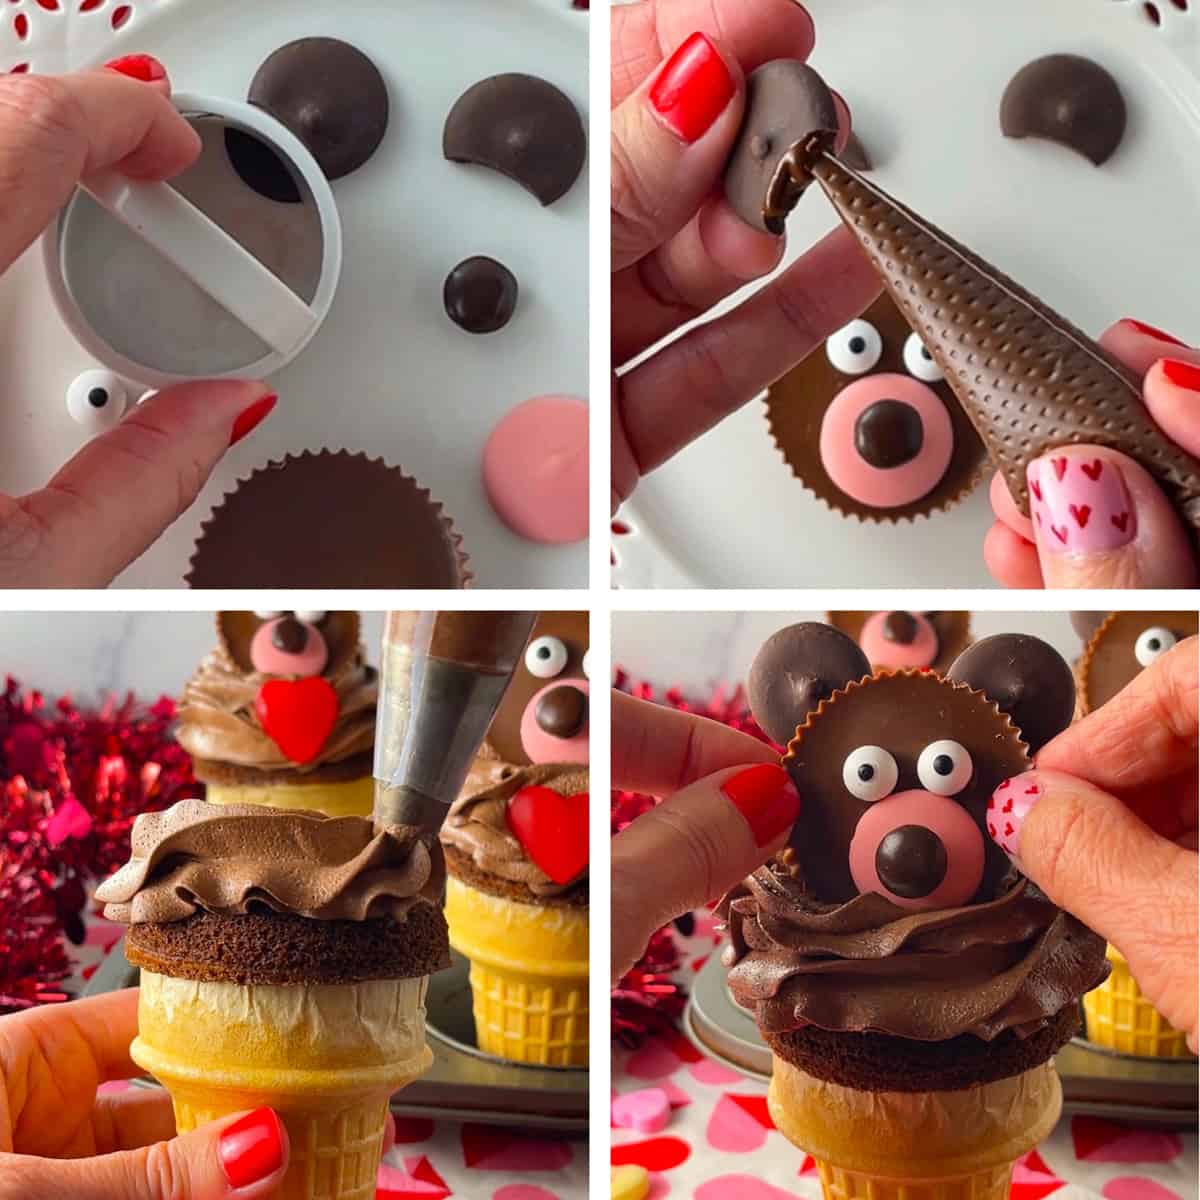
5) Making the teddy bear faces. For the ears: Use a small biscuit cutter to cut off a small piece of the chocolate candy melt. Repeat. You'll need 24 candy melts.
6) Melt ½ cup of semi-sweet chocolate chips in the microwave in a microwave safe bowl according to package instructions. Pour into piping bag or plastic bag, secure opening. Cut a tiny corner and pipe melted chocolate on ears to stick the to the top of the peanut butter cups. For the nose of the bear: Use melted chocolate to stick the pink candy melt and brown M&M onto peanut butter cup. Then attach candy eyes the same way. Place in the refrigerator to set.
7) Make homemade chocolate frosting using hand mixer or stand mixer. Place in pastry bag fitted with a 1M star tip. Pipe chocolate buttercream onto cooled cupcakes.
6) Place peanut butter cup bear in the middle of the frosting. Then place a red candy hard just under the face. Repeat for remaining cupcakes. Now you have your cute little bears all done.
Expert tips
• Room Temperature Ingredients - For best results, always use room temperature ingredients for most baking projects. Chilled ingredients mix differently and affect the consistency of the recipe.
• Prepared Pan - It's very important to grease your cupcake pan very well to make sure your cone cakes don't stick. (Do not use a silicone pan because it's too floppy). Use shortening or butter and rub it all over the inside of the pan, covering all the crevices. I used a generous amount of Crisco and they popped out perfectly after baking and cooling.
• Making the Cones Straight - When placing the cones on top of the batter before baking, try to place them as straight as possible. Then gently press them slightly into the batter to help stabilize them when they bake.
• Serving Suggestion for Cupcake Cones -If you're serving them at a Valentine's party, place each place each cupcake in a clear plastic cup with a handful of M&M candies in the bottom of the cup to stablize the cupcake and also look cute (preferrably holiday colors).
Frequently asked questions
How much batter do I put in the muffin pan? This is an important question. Make sure you don't over-fill them. You only need to fill the muffin cup ⅔ full. It helps if you use a medium scoop or muffin scoop.
Does the ice cream cone burn in the oven? Lots of people have asked this question and the answer is no. As long as you bake your ice cream cone cupcakes on the middle rack of a 350°F oven for about 22 minutes, they will not burn.
How do I store my adorable treats? Place cupcakes in the cupcake pan that you baked them in (after it's cooled). You can place a little bit of aluminum foil around the base of each cone to stablize them, if you wish. Store in refrigerator. Thaw before serving.
How do I transport my cupcakes? You can transport them the same exact way that you store them in the muffin pan. Then loosely cover with plastic wrap. Be careful! If possible, have a friend hold them in their lap in the passenger's seat of your car.
Can you make this cupcake recipe gluten free? Yes! Just substitute a gluten free cake mix and gluten free ice cream cones instead of the regular cake mix and cones.
Related Recipes
Love this recipe? If you try it, be sure to tag me on @Instagram! You can also find me on Pinterest, YouTube and Facebook.

Valentine Teddy Bear Cupcakes
Equipment
Ingredients
- 1 box cake mix, prepared according to package.
- 1 batch homemade chocolate buttercream frosting recipe is on my website
- 12 ice cream cake cones
- 12 peanut butter cups
- 24 candy eyes
- 24 chocolate candy melts
- 12 pink candy melts
- 12 brown M&M candies
- ½ cup semi-sweet chocolate chips, melted
- 12 red candy hearts we used Brach's Cherry Heart Jelly Candies
Instructions
- In a large mixing bowl, mix up the cake batter with an electric mixer according to package instructions. Use a muffin scoop to scoop prepared batter into greased muffin tins or cupcake pans. (You don't even need cupcake liners.) Make sure you don't over-fill them. You only need to fill the muffin cup ⅔ full.
- Add an upside down ice cream cone on top of the batter in each muffin cup. Make sure they're placed straight and press them slightly into the batter. Bake cupcakes at 350°F for 20-22 minutes or until toothpick inserted in middle comes out clean. Let cool on wire rack.
- Making the teddy bear faces. For the ears: Use a small biscuit cutter to cut off a small piece of the chocolate candy melt. Repeat. You'll need 24 candy melts. Melt ½ cup of semi-sweet chocolate chips in the microwave in a microwave safe bowl according to package instructions. Pour into piping bag or plastic bag, secure opening. Cut a tiny corner and pipe melted chocolate on ears to stick the to the top of the peanut butter cups. For the nose of the bear: Use melted chocolate to stick the pink candy melt and brown M&M onto peanut butter cup. Then attach candy eyes the same way. Place in the refrigerator to set.
- Make homemade chocolate frosting using hand mixer or stand mixer. Place in pastry bag fitted with a 1M star tip. Pipe chocolate buttercream onto cooled cupcakes. Place peanut butter cup bear in the middle of the frosting. Then place a red candy hard just under the face. Repeat for remaining cupcakes. Now you have your cute little bears all done.




Leave a Reply