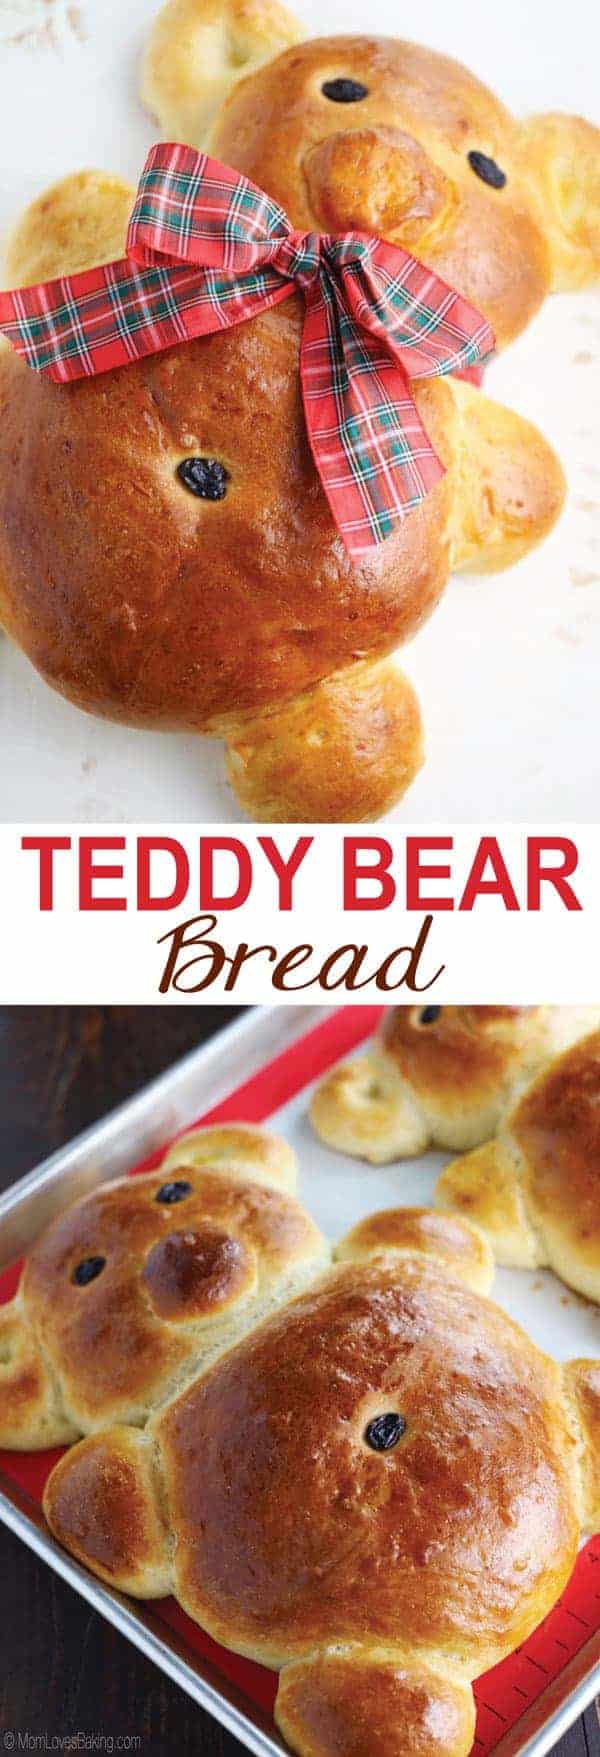
Teddy Bear Bread
Teddy Bear Bread is a homemade yeast bread shaped like a bear with raisin eyes and belly button. Kids love it and it also makes a great gift for the holidays. Recipe makes 2 loaves.
The Story Behind this Vintage Recipe
This Teddy Bear Bread is a recipe that’s been in my recipe box for a very, very long time. Probably 40 years. The first time I made it, I was in middle school. My best friend, Stacy, and I had to make a meal for our Spanish class. We chose Paella and this bread. I’ll never forget making it because it took us a long time. You have to let it rise two times for an hour each time, so by the time the bread was finished, it was very late at night and we were completely slap happy! I remember lots of giggling going on. I’m talking about the kind of laughter where you can’t stop and no sound comes out. Good times!
Teddy Bear Bread does take some time to make but it is so worth it! Not only is it completely adorable, but it’s also completely delicious!
How to Make Teddy Bear Bread
I created a video to show you the step-by-step instructions for making this bread (scroll down to see below).
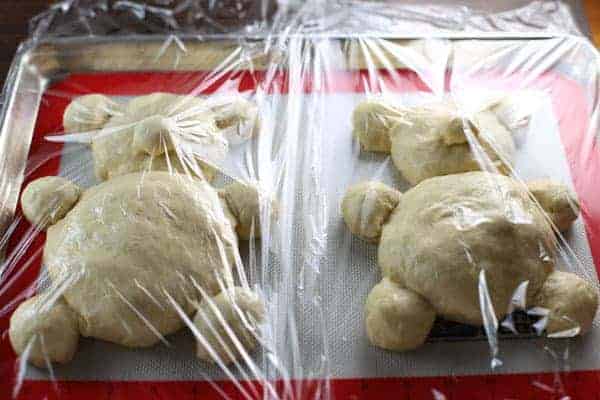
After you’ve mixed up the dough, you let it rise for an hour (covered). Then you punch it down and create two bears from the dough. Place them on a baking pan lined with a silicone mat. Cover and let rise for another hour.
Here’s where you can find the silicone baking mat on Amazon (affiliate):
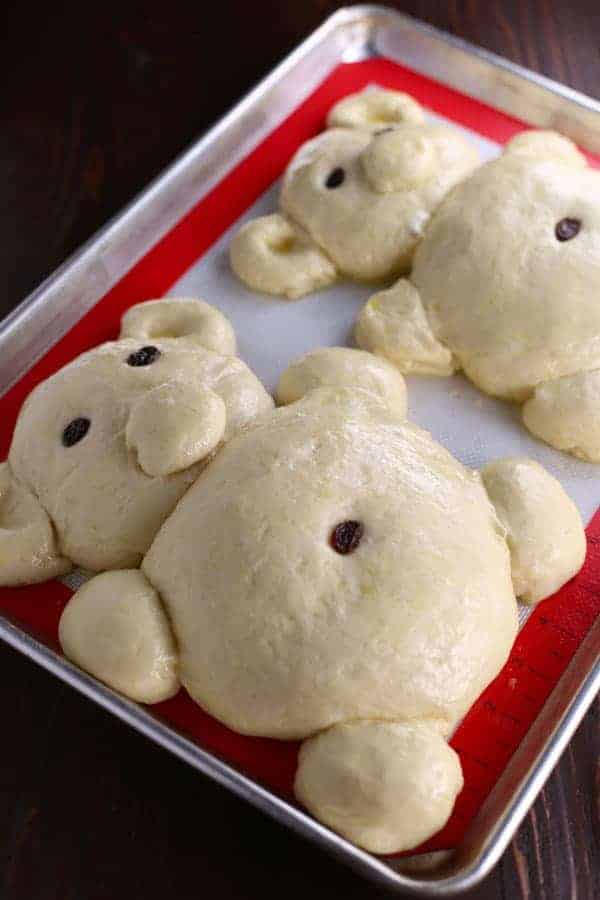
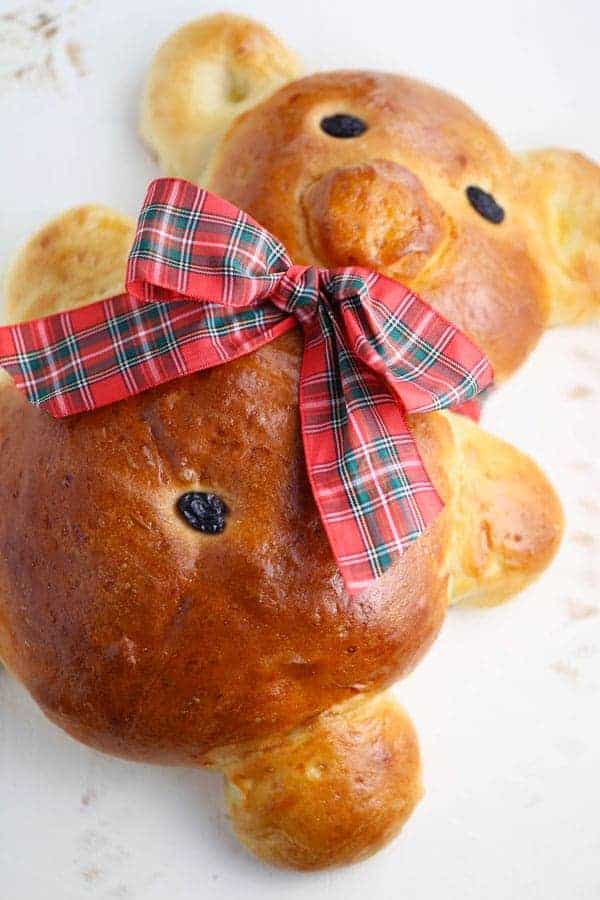
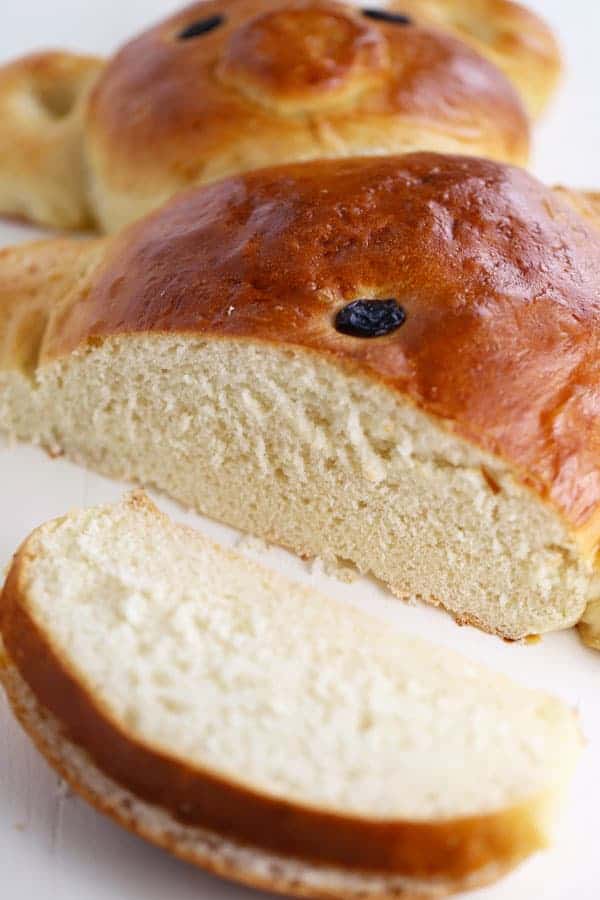
Add raisins for the eyes and belly buttons. Brush bears with an egg wash.
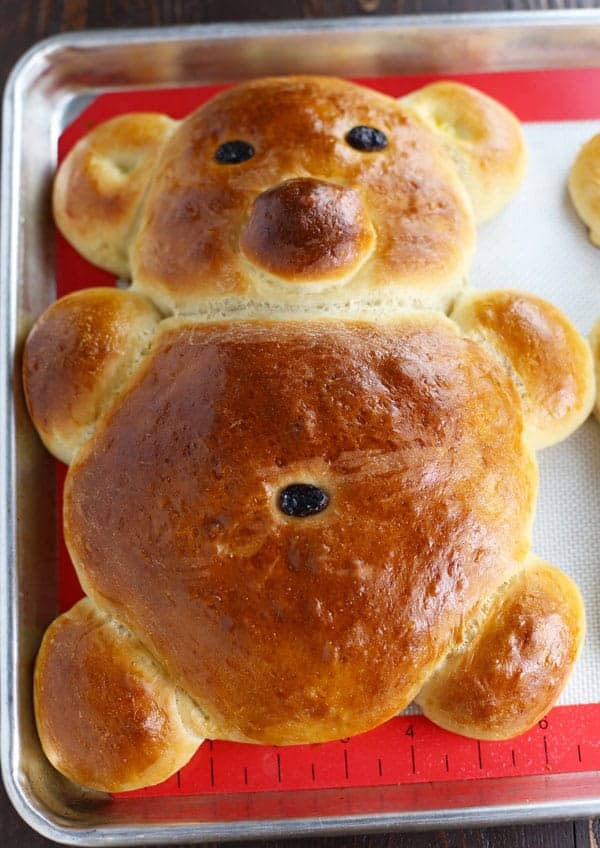
Bake at 400°F. for 25-30 minutes.
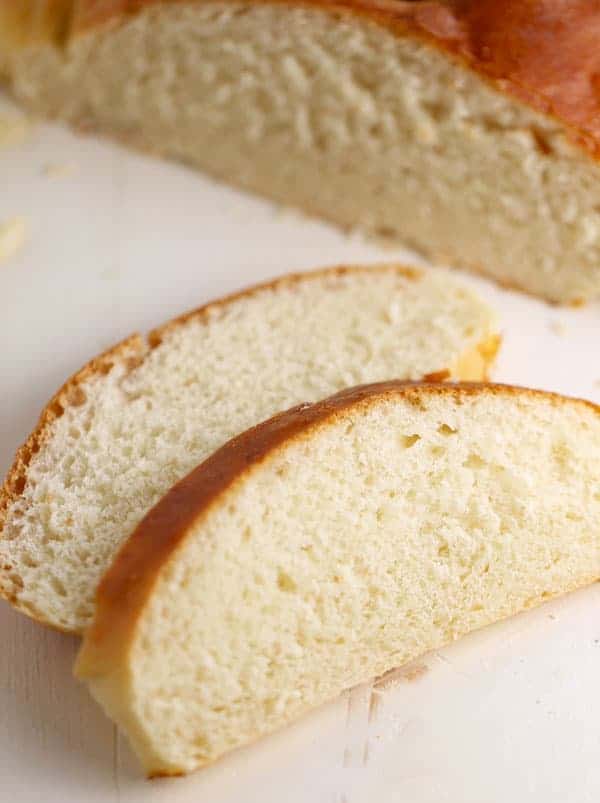
Slice and enjoy.

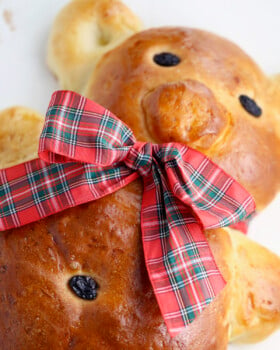
It makes a great gift! Doesn’t he look so cute with a plaid ribbon tied around his neck? He was a gift for my sweet neighbor who turned 9. I think she really liked it!
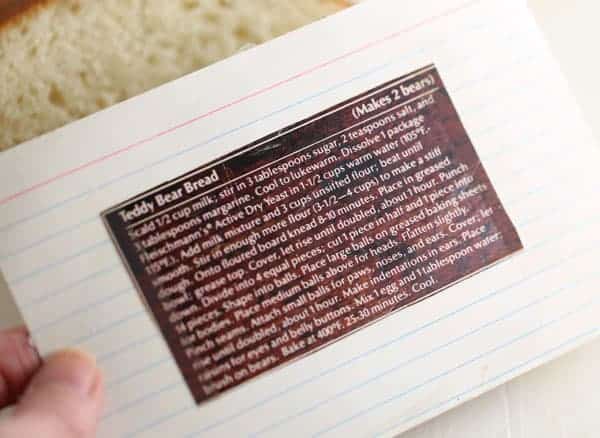
Here’s my very old recipe card. I found the recipe in a magazine. Not sure which one but it would have been in the late 1970s. Probably Better Homes and Garden or maybe it was from Parade Magazine. I’m not sure, but I am very glad I kept it!
Tools for success
Stackable Mixing Bowls – Set of 10
Note: The above items are affiliate links. As an Amazon Associate I earn from qualifying purchases.
Want even more? Subscribe to Mom Loves Baking to get new recipes and a newsletter delivered to your inbox. And stay in touch on Facebook, Pinterest, Twitter, and Instagram for all my latest updates. If you make this recipe, share a photo on social media tagging @momlovesbaking and using the hashtag #momlovesbaking.
Teddy Bear Bread
Ingredients
Instructions
- Scald 1/2 cup milk; stir in sugar, salt, and margarine. Cool to lukewarm. Dissolve yeast in warm water. Add milk mixture and 3 cups of the flour; beat until smooth.
- Stir in remaining flour to make a stiff dough. Place dough on floured surface and knead 8-10 minutes. Place in greased bowl; grease top. Cover, let rise until doubled, about 1 hour.
- Punch down. Divide dough in half and make one bear out of each half. I used more than half of the half for the bear's body. Then use the remaining dough for the head, ears, nose, hands and feet. Shape the main piece of dough into a big ball and place on a sheet pan lined with a silicone mat or greased. Shape a smaller ball for the head. Then add even smaller balls for the remaining body parts.
- Cover and let rise for one hour. Add raisins for eyes and belly buttons. Beat egg and add 1 tablespoon of water. Mix well and brush onto bears. Bake at 400°F. for 25-30 minutes. Slice and serve. Or decorate with ribbon and give as a gift. Store bread covered at room temperature for one day. It also freezes well. Makes 2 loaves of teddy bear bread.
Did you make this recipe?
Please let us know by leaving a star rating and review!All text and images © Lise Ode for Mom Loves Baking. Please do not use my images without prior permission. If you want to republish this recipe, please re-write the recipe in your own words, or link back to this post for the recipe. Disclaimer: Nutrition information shown is not guaranteed to be accurate. This post may contain affiliate links.
i’ve used the exact recipe from an old magazine for 40+ years.
Back in the 70s, my children were small. I found a picture of a graham-flour teddy bear loaf and the corresponding recipe and made three bears, 1 for each child. They still talk about those bears after all this time. My daughter remembered that she let hers mold away because she couldn’t bring herself to eat it. The boys had no such problem. Today I bought whole wheat flour and now have bears on my agenda, though I’ll have to work out the flour mix before beginning. Thanks for posting this; I searched quite a while before finding these little fellas.
Ahhh, thank you for sharing your memories about the teddy bear bread. I love that you made one for each child. Enjoy!
These bears make EVERYONE smile! I actually have the same clipping in my old recipe box as is shown here. That’s how long I’ve been making these bears. Once I made them and sent them by overnight mail to my newly married daughter 600 miles away because her new mother-in-law did not believe such things existed! It was a Christmas treat.
I’ve made them with my now grown and married granddaughter, given them as gifts, and even kept one or two to share with my husband.
It is Christmas again. I will make and give these bears to my 11 and 14 year old grandsons.
If I am extremely fortunate, I might make these bears with, or for, a great grandchild. Just do it. The bread is as good tasting as it is fun to look at.
A word of caution: take care not to injure the bears lifting them from the baking sheet.
Hi Helen, Thank you so much for sharing your bear bread baking stories. I love that you’ve made it for so many years and even mailed it as a gift 600 miles away. That’s amazing. Merry Christmas! xo, Lise
Are there any make ahead/ freeze instructions
I have been making this since I won a Blue ribbon & Best of Show at local fair in the 80s. It is a Thanksgiving tradition & the kids love to watch as we “sacrifice” the bear!
That’s so cool. Thank you for sharing your Teddy Bear recipe memories!
I made this years ago……1980 from an old recipe in Southern Living magazine.
I am going to try to make a chicken design one.for a party this weekend..
Thank you for commenting. It’s great to hear from readers that are familiar with this recipe. I would love to see your chicken. Are you on Instagram? If so, tag your pic @momolovesbaking.
this so completely adorable actually made something like the bears years ago be fun to make nice to see the recipe again
thank you diane
Thanks, Diane! Glad you liked it. :))
So cute! This is creative!
I love these cute bears!
This is so stinking cute! My little would LOVE this!
I forwarded the video to my girlfriend so she can make it with her grandchildren.Thank you for the recipe.
Oh my word!! These are just too adorable! Layla would love to make these with me!