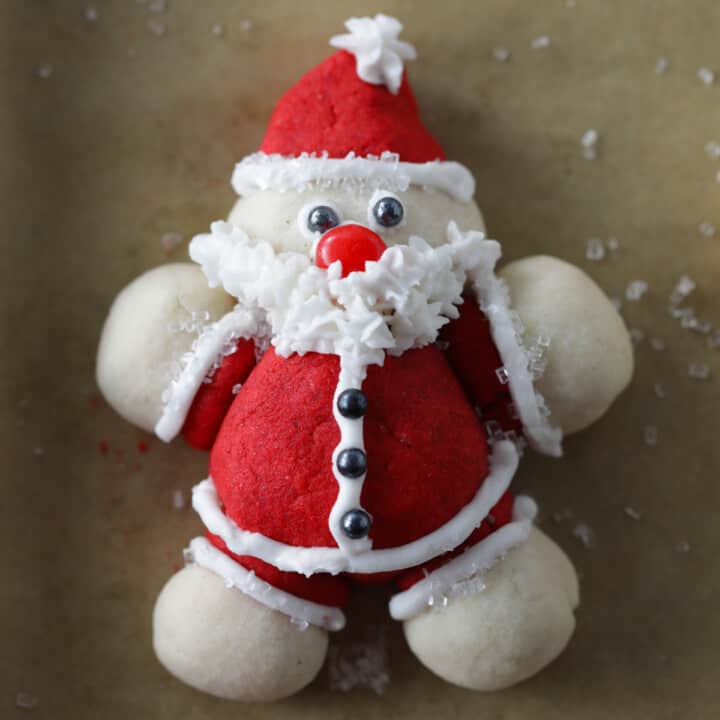
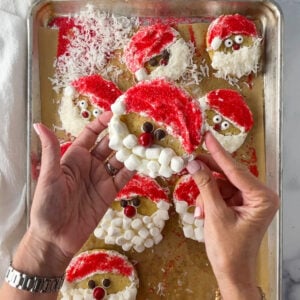
If you’re looking for the cutest gluten-free Christmas cookie ever… say hello to Gluten Free Santa Sugar Cookies! These soft, buttery vanilla cookies bake up beautifully and are decorated with sweet buttercream frosting, red sanding sugar, chocolate chip eyes, and a fluffy coconut beard. They look just like jolly little Santas - and they’re surprisingly easy to make!

This is such a fun holiday baking project for kids, cookie exchanges, classroom parties, or cozy December afternoons in the kitchen. And the best part? They taste as good as they look! No one ever guesses they’re gluten free.

Why You’ll Love These Santa Cookies
• Soft, buttery, classic sugar cookie flavor—just like the traditional version.
• Completely gluten free using your favorite 1:1 flour blend.
• No cookie cutter needed, simply roll the dough into balls with your hands.
• Kid-friendly and super fun to decorate using simple ingredients.
• Easy to customize with sprinkles, coconut, marshmallows, and more
What You Need
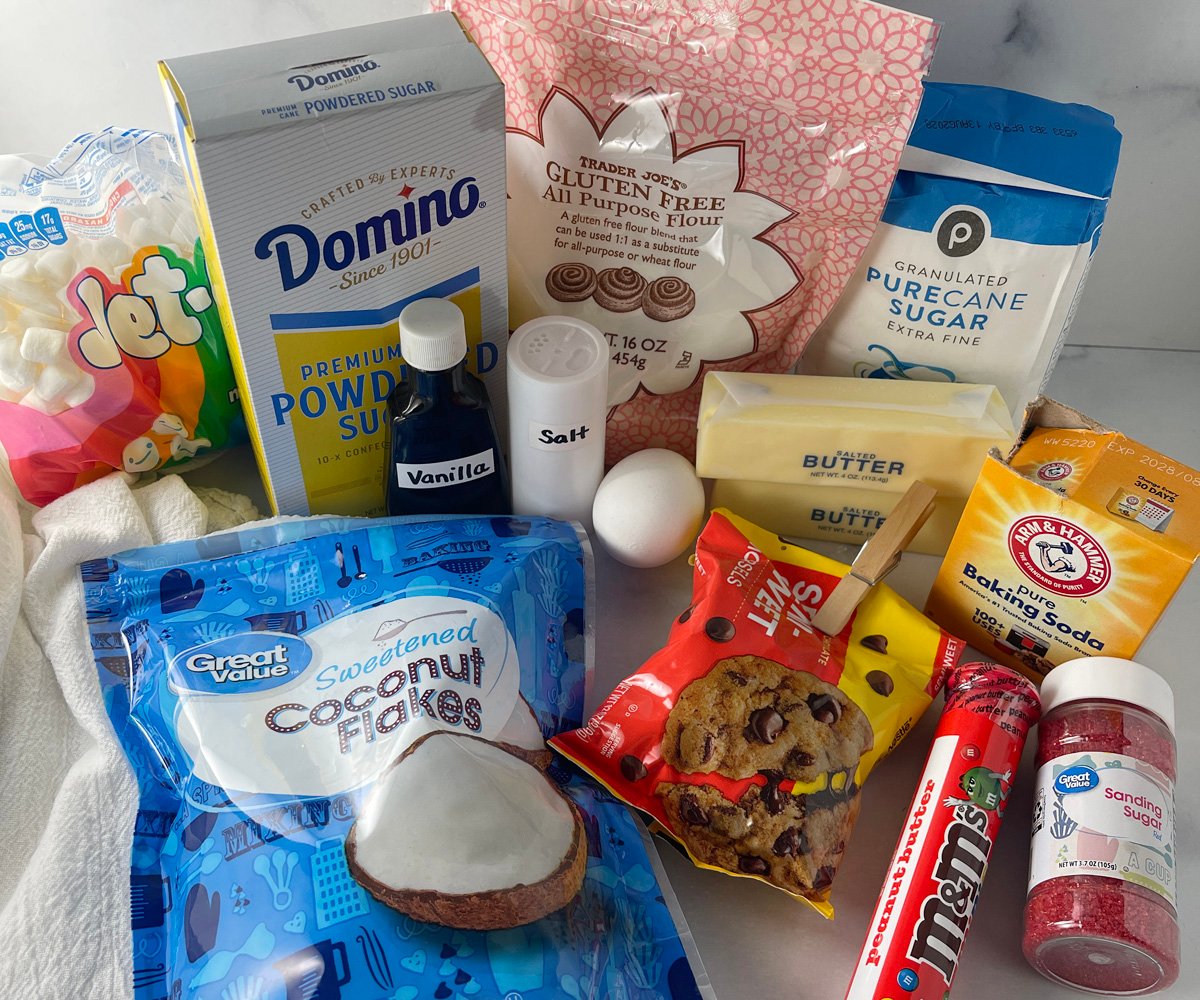
Ingredient Notes
• Gluten-Free Flour: Use a high-quality 1:1 gluten-free all-purpose flour with xanthan gum for the best texture.
• Butter: Make sure it’s softened (not melted) so the dough whips up light and fluffy.
• Vanilla: Pure vanilla gives the cookies rich holiday flavor.
• Red Sanding Sugar: Creates Santa’s bright red hat without needing red food coloring.
• Chocolate Chips & Mini M&Ms: Easy edible “face” pieces that stick perfectly with frosting.
• Coconut or Mini Marshmallows: Both options make a sweet, fluffy beard - choose your favorite look!
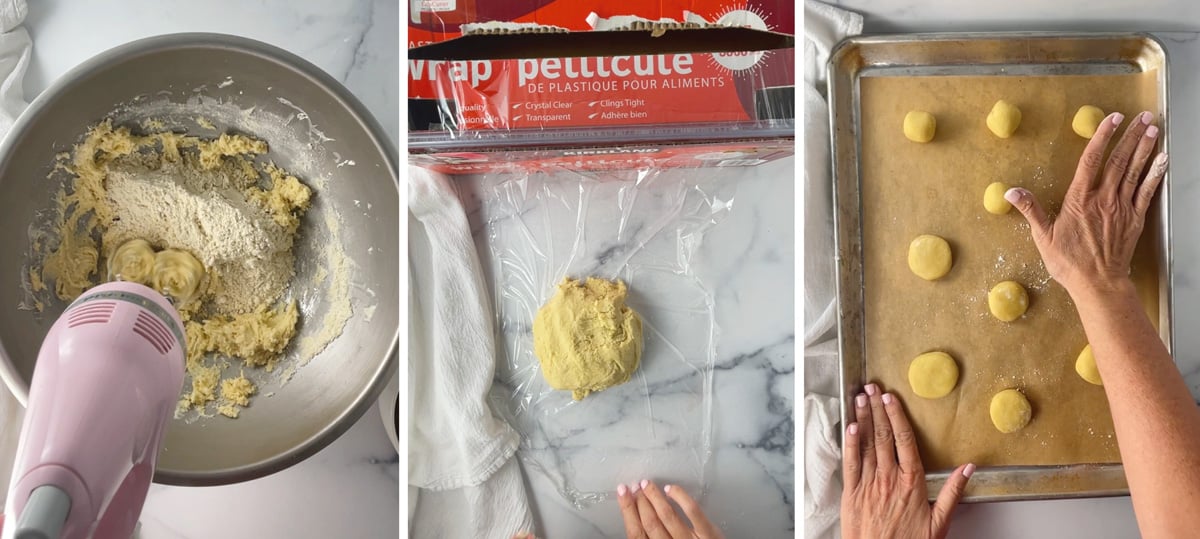
How to Make Gluten Free Santa Sugar Cookies
• Cream the butter and sugar, add egg and vanilla with mixer, then mix in the dry ingredients.
• Wrap and refrigerate the dough for at least 2 hours (this helps the cookies keep their shape).
• Roll into balls, place on parchment lined cookie sheets and press gently with the palm of your hand to flatten dough. I like to use 18" x 13" half sheet pans because they have raised edges. Makes 24 balls of dough.
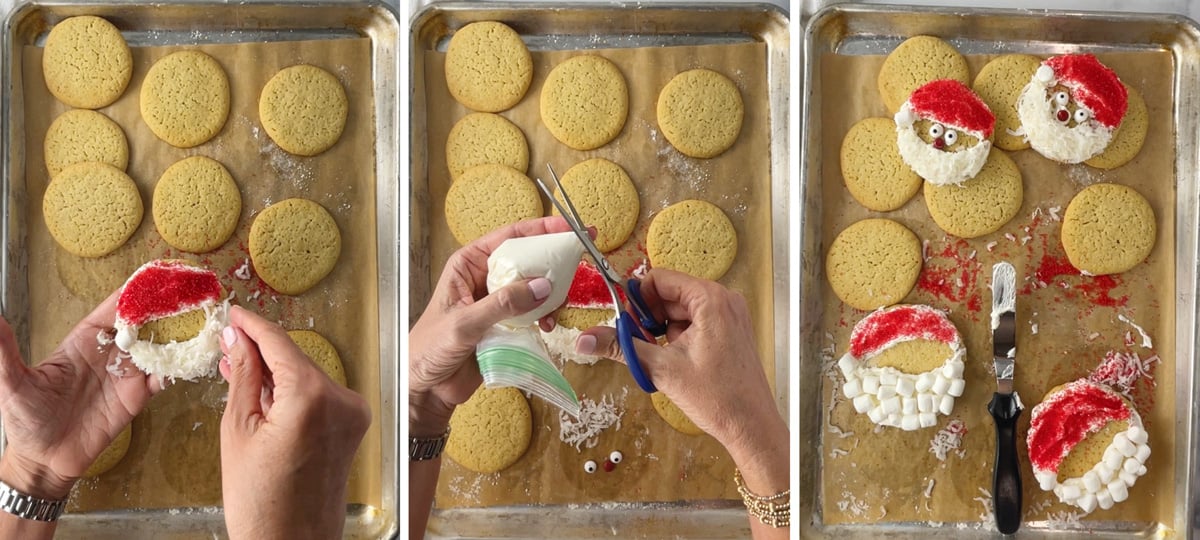
• Bake at 350°F for 9–11 minutes and cool completely. Meanwhile, make a simple vanilla buttercream.
• Frost the top of the cookie and add red sanding sugar to the hat. Frost the bottom section, press on coconut or marshmallows for the beard, and finish with chocolate-chip eyes and a red candy nose (use frosting to attach).
Quick Tips for Success
• Chill the dough - It’s the secret working with gluten free cookie dough.
• Don’t overbake - The cookies should be slightly golden around edges.
• Use a piping bag or zip-top bag to place frosting precisely for eyes and noses.
• Work in batches - Decorate a few cookies at a time so the frosting doesn’t dry before adding toppings.
• Tint the frosting red (optional) for a richer hat color before adding sanding sugar.
Frequently Asked Questions
• Can I make these dairy free? No, I would not recommend using dairy free butter.
• Can I make the dough ahead? Absolutely. The dough keeps in the fridge for up to 48 hours or freezes for up to 2 months.
• Do the cookies spread while baking? Yes, they do spread a little bit but that's what you want so they will spread to about 3 inches in diameter when baked.
• Can I freeze the decorated cookies? It’s best to freeze undecorated cookies and decorate after thawing, so the faces stay neat.
• What gluten-free flour works best? Any 1:1 blend with xanthan gum works beautifully - Bob’s Red Mill, King Arthur, or Trader Joe's are great options.

A Special Note
My friend Haley and I actually made these Santa cookies together to help promote her adorable new children's book, A Gift From Nicholas: The Adventures of Saint Nicholas and the Magic of Giving by Haley Bechet. It’s such a sweet, heartwarming story for young kids who are wondering if Santa is real and curious about the magic of giving. If you’d like to check it out, the book is available now on Amazon!
Related Recipes


Love this recipe? If you try it, be sure to tag me on @Instagram! You can also find me on Pinterest, YouTube and Facebook.
Gluten Free Santa Sugar Cookies
Ingredients
For the cookies
- ¾ cup unsalted butter, softened
- ¾ cup granulated sugar
- 1 large egg, room temperature
- 1 teaspoon pure vanilla extract
- 2 cups gluten free all-purpose flour we used Trader Joe's
- ½ teaspoon salt
- ½ teaspoon baking soda
For the frosting
- ½ cup (or 1 stick) butter, softened we used salted butter
- 2 cups powdered sugar or 8 ounces
- 2 tablespoons heavy whipping cream
- ½ teaspoon vanilla extract
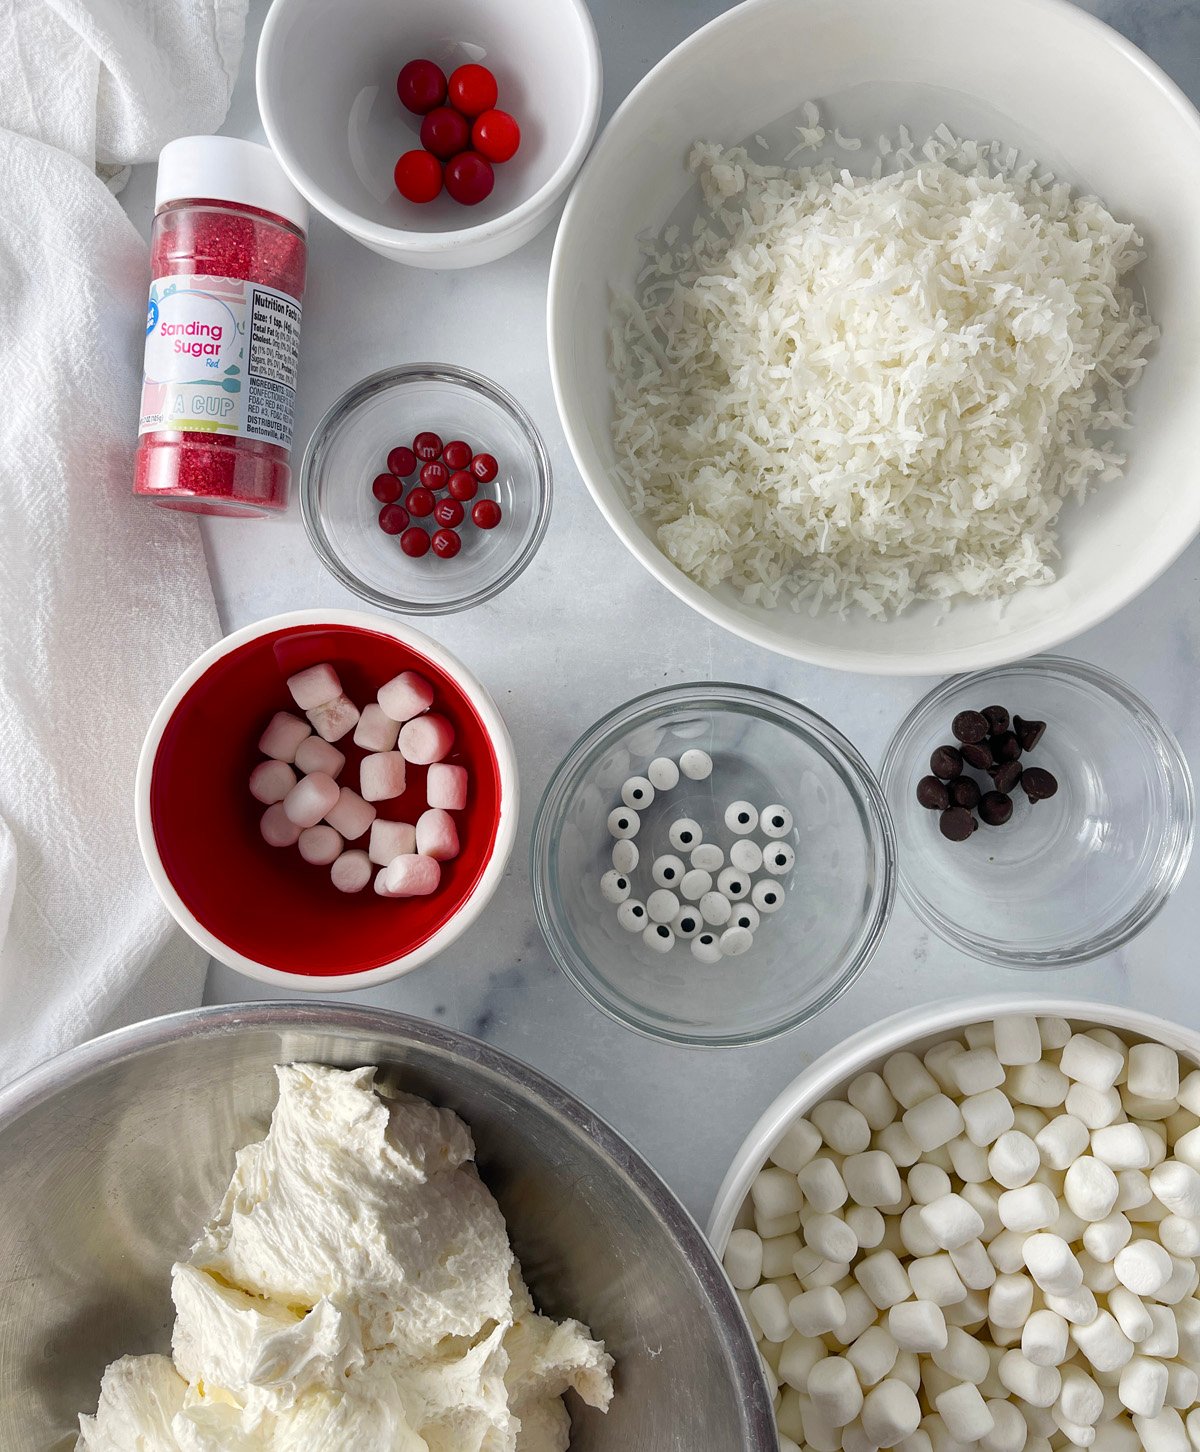
For decorating
- 2 tablespoons red sanding sugar (for hat)
- 24 mini marshmallows
- 48 mini chocolate chips (for eyes) or candy eyes
- 24 mini red m&m's (for noses) or red hots or gumballs
- ¾ cup sweetened shredded coconut (for Santa’s beard) or mini marshmallows
Instructions
For the cookies
- In a large bowl, beat the butter and sugar with an electric mixer until light and fluffy (2–3 minutes). Add the egg and vanilla; mix until combined. In another bowl, whisk together gluten free flour, salt, and baking soda. Gradually add to the wet ingredients and mix just until a dough forms. Wrap the dough in plastic wrap and refrigerate for at least 2 hours (or overnight).
- Preheat oven to 350°F (177°C). Roll into balls, place on parchment lined cookie sheet and press gently with the palm of your hand to flatten dough. (Makes 24 balls of dough.) Bake for 9–11 minutes, or until the edges are just set. Cool completely on wire racks.
For frosting and decorations
- Beat softened butter until creamy. Gradually add powdered sugar, cream, and vanilla. Beat on high for 2–3 minutes until light and fluffy. Spread a thin layer of frosting over top portion of each round cookie to resemble the hat. Sprinkle the hat area generously with red sanding sugar. Spread more frosting onto the bottom portion of the cookie. Add coconut or marshmallows to represent the beard. Attach two chocolate chips for eyes and a red candy for the nose, plus one mini marshmallow at the tip of the hat, securing them with a dab of icing. Allow frosting to set before storing or packaging.
- Yield: Makes about 24 cookies. Storage: Store in an airtight container at room temperature for up to 3 days or refrigerate for up to a week. Freezing: You can freeze undecorated cookies for up to 2 months; decorate after thawing.
Leave a Reply