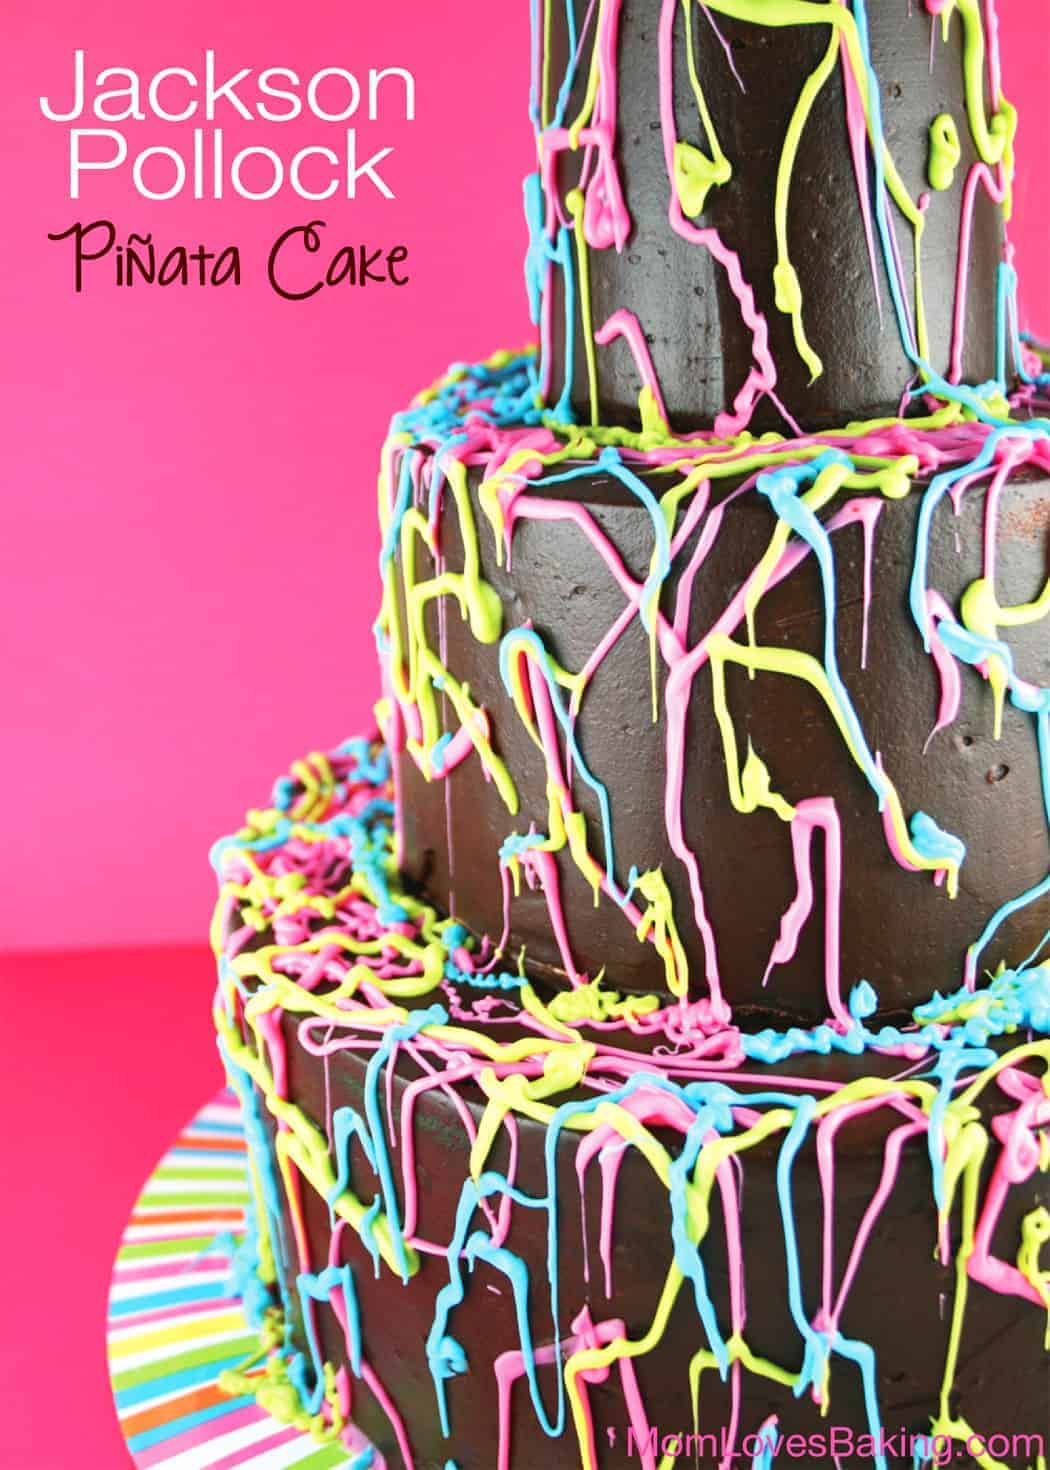
Jackson Pollock Piñata Cake
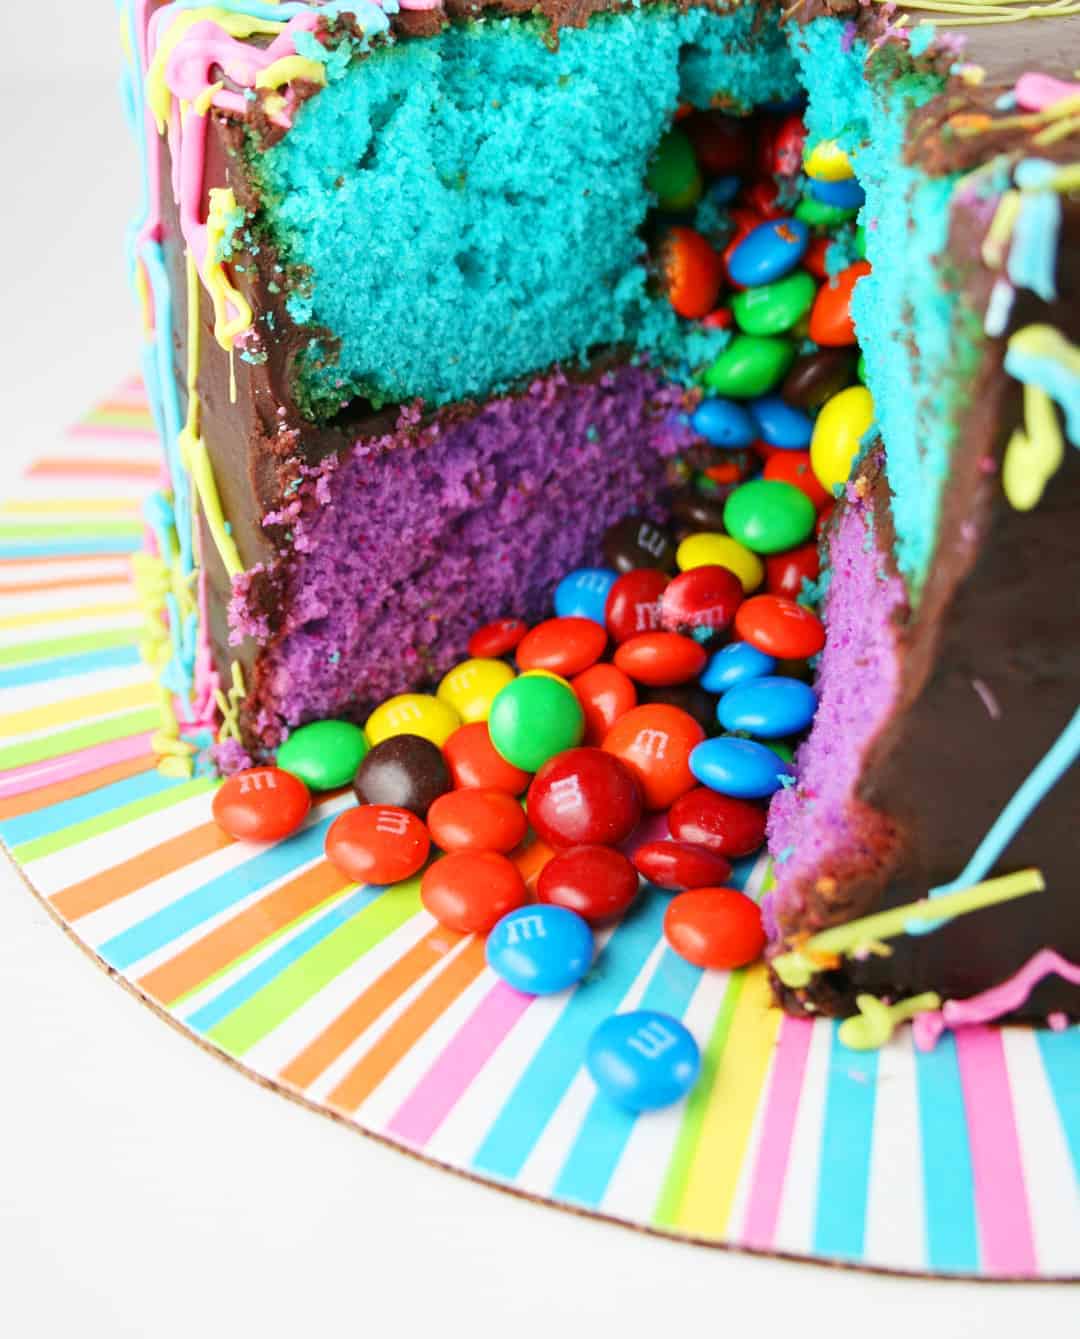
Six layers of cake, each a different color with M&M’s in the middle that spill out when you slice this extra special Jackson Pollock Piñata Cake.
I’m back! We moved to a new house a couple of weeks ago and I have been so busy with packing/unpacking. Blogging was not an option. But my daughter’s 12th birthday came around and move or no move, this is the cake that she chose. Luckily my cake tools were at my fingertips. And my camera too. Isn’t it fancy! And wait ’til you see what’s inside.
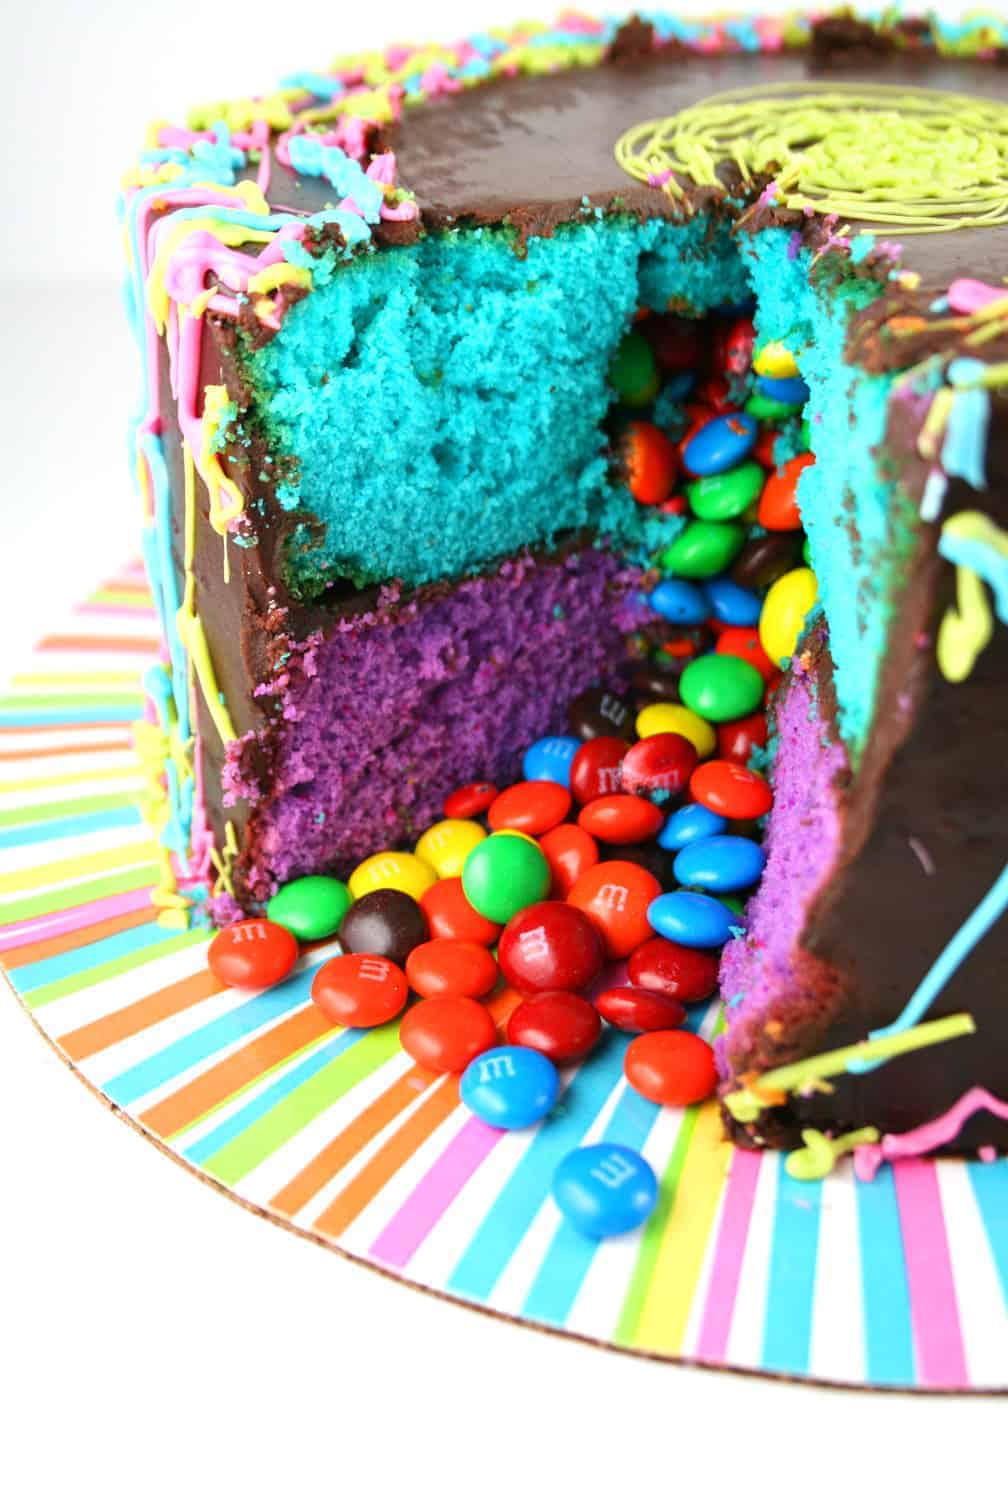
Isn’t it fun! And it’s also a rainbow cake. There were six layers and each one is a different color. Achieving the piñata effect wasn’t as hard as you might think. It’s actually fairly simple. The most time consuming part of the whole thing was making all the layers different colors.
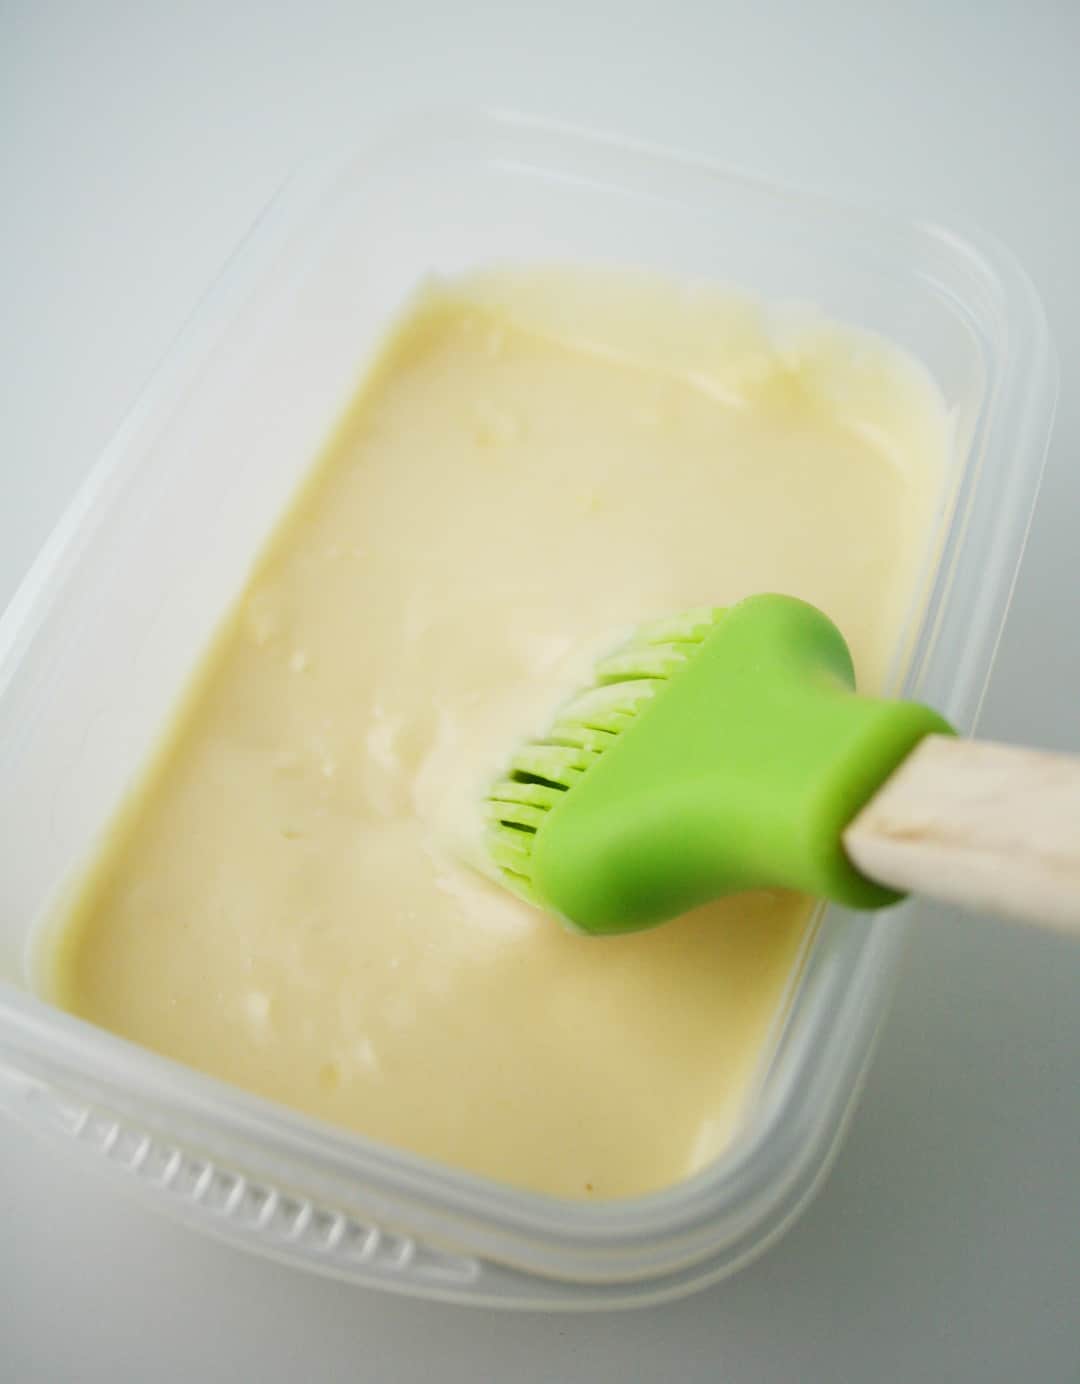
I always start my cake projects by preparing my cake pans. For this cake, I used 3×1.5-inch, 6×1.5-inch and 9×1.5-inch round cake pans (2 of each). I found this great recipe for “Goop” or Homemade Pan Release on the I Am Baker website. Click here for the recipe. It’s so easy to make with equal parts vegetable oil, vegetable shortening and flour. I used butter flavored Crisco because that’s what I had on hand.
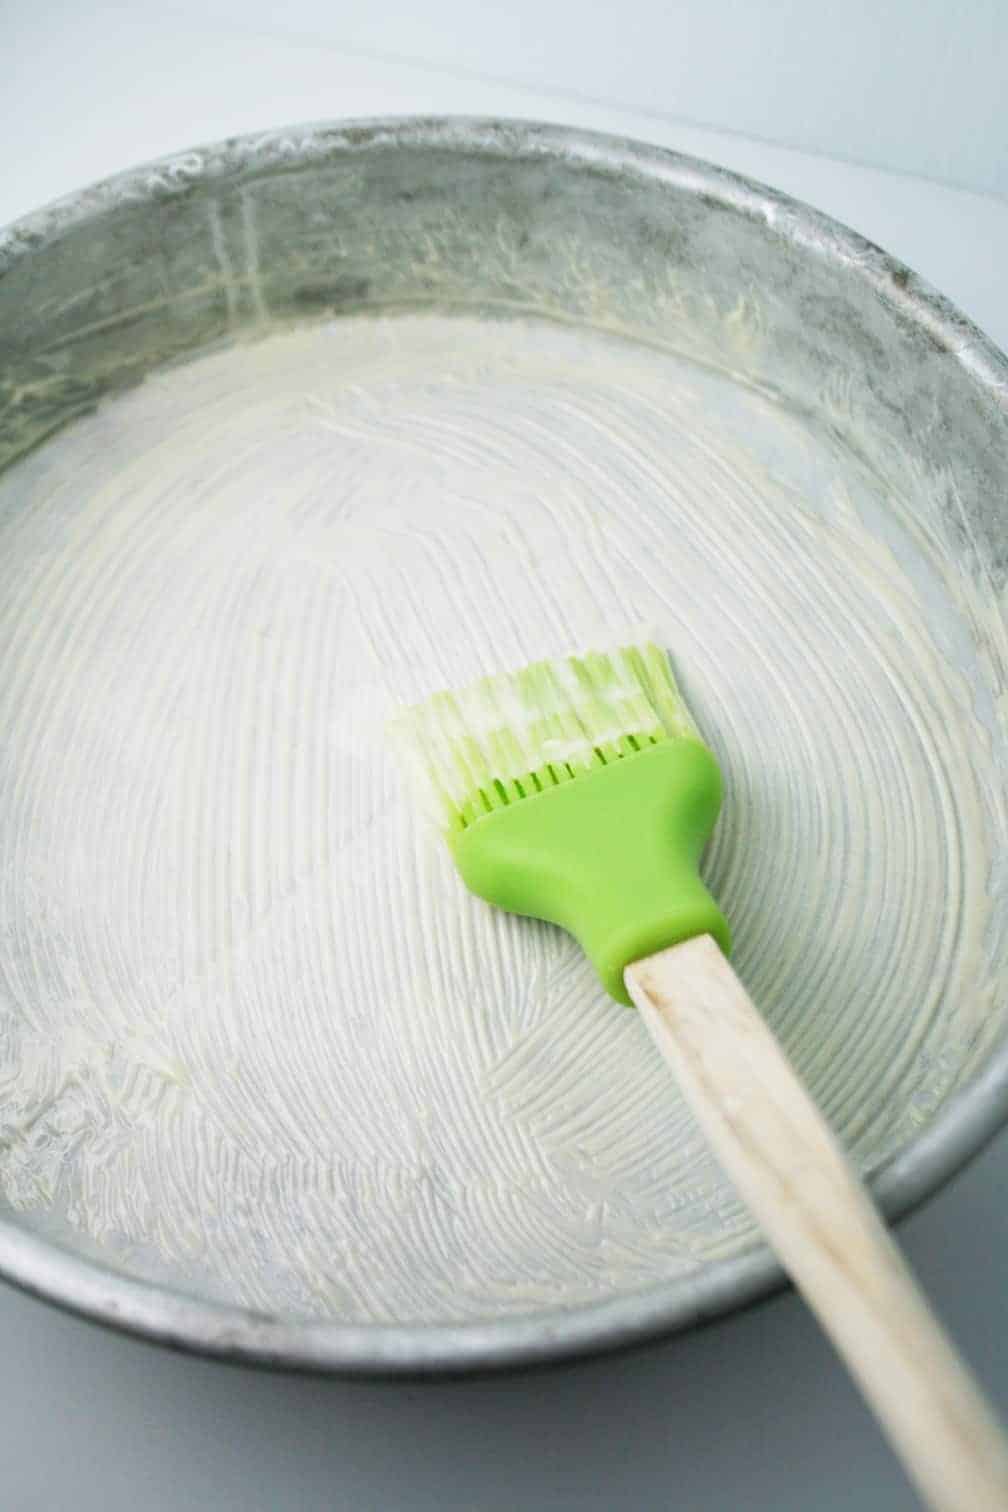
You simply brush the goop on and store the leftovers in the refrigerator. I also lined my pans with parchment paper and brushed the goop on top of that as well.
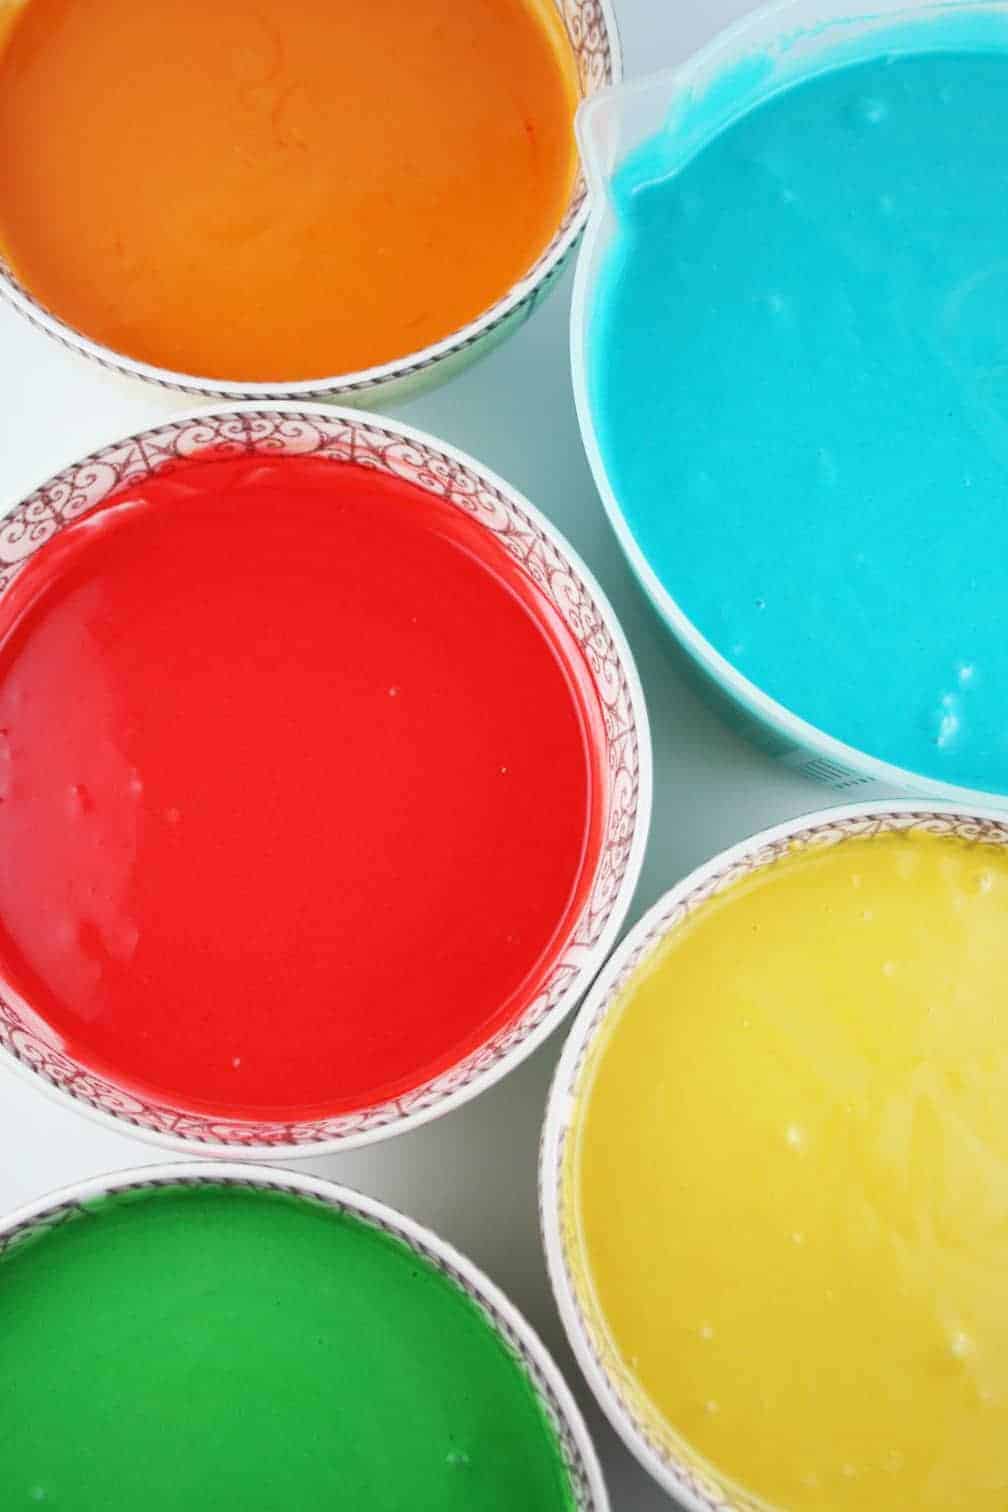
I used 3 boxes of white cake mix and prepared the batter according to the package instructions. From my days of making wedding cakes, I found it easiest to weigh the batter for each pan. The amounts that I came up with for these sizes are as follows: 6 ounces of batter per 3-inch pan, 18 ounces of batter per 6-inch pan and 41 ounces of batter per 9-inch pan. If you don’t have a scale, then you will have to eyeball it. In that case, it might be easiest to NOT color the batter. If you DO have a scale, then you can weigh the batter into bowls for your various colors. Decide ahead of time which color you want for each layer of cake. Then add the food coloring of your choice to the bowls of batter. Bake the cakes in a 350° oven. The smallest cakes will take the least amount of time. Mine took about 25 minutes. The 6-inch layers took about 45 minutes and the 9-inch layers took almost an hour. It will depend on your oven. You can test the middle to see if it’s done by inserting a toothpick. If it comes out clean, then it’s done. If not, stick it in for 5-10 minutes more.
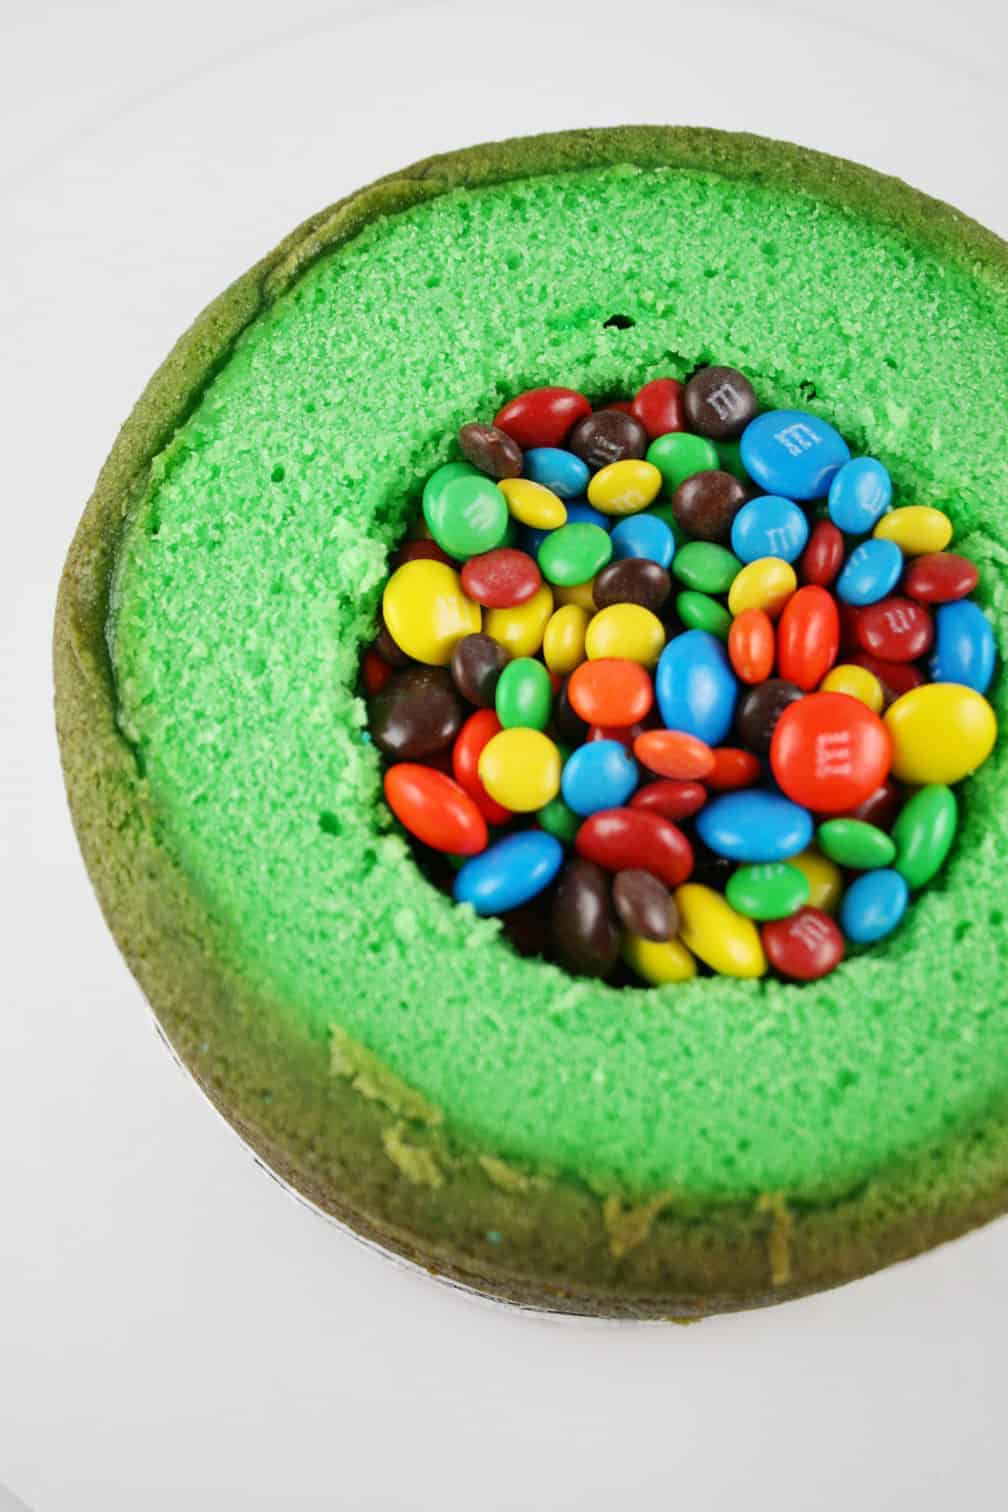
Let the cakes cool completely before working with them. I think it’s even best to cover them and refrigerate over night. They’re easier to work with that way. Place the bottom layer on a cake board. Cut a 4-inch circle in the middle of the cake, letting the knife go about halfway down. Scoop out the cake from the circle. Fill to the top with M&Ms. I used 2 (12 oz.) bags for the entire project. Set aside and make your chocolate frosting. Recipe follows. Spread frosting around the top edge of the cake. Take the second layer of cake and cut another 4-inch circle in the middle, this time going all the way through the cake. Remove the middle section from that layer and save it for later. Place that layer on top of the frosted layer. Pour more M&Ms inside the hole, filling it a little more than halfway. Replace the middle section that you removed, but cut it in half horizontally so that it will fit. Frost the entire cake and make it as smooth as possible. Repeat these steps for the next 2 tiers but make the hole in the middle slightly smaller.
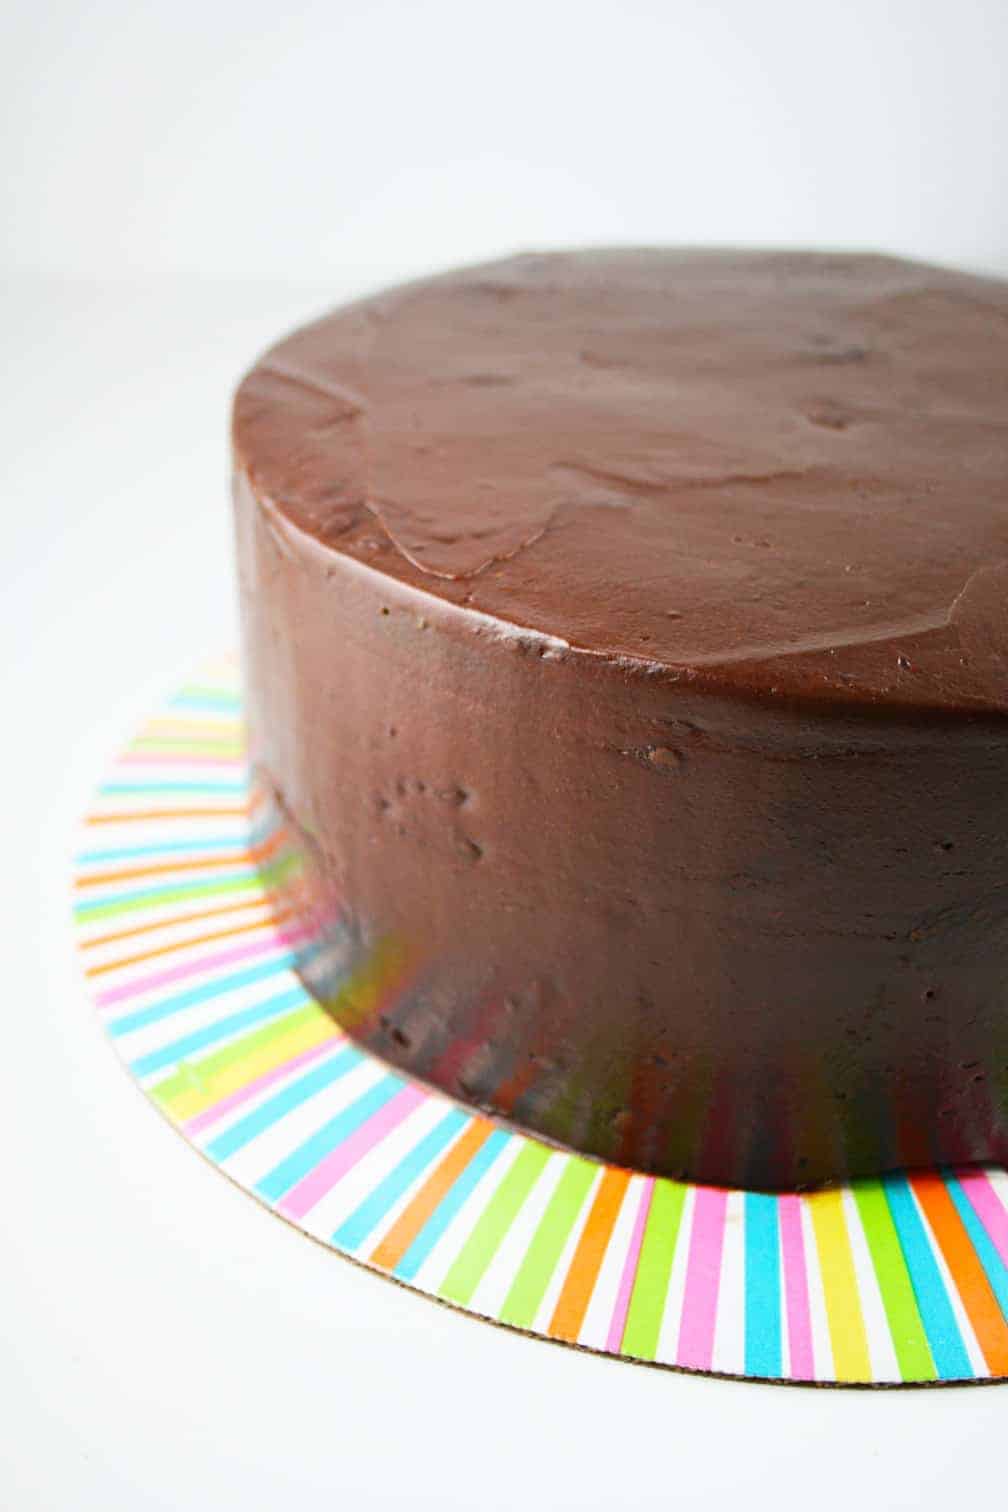
The chocolate frosting only has 2 ingredients. Semisweet chocolate chips and sour cream. See below for recipe. After frosting all 3 tiers, I let them chill in the refrigerator for several hours. Actually, I took my daughter and 4 of her friends to the movies. We saw Maleficent. In 3D. It was a matinee. Excellent movie. I was pleasantly surprised as far as kid movies go. Meanwhile, back in the kitchen.
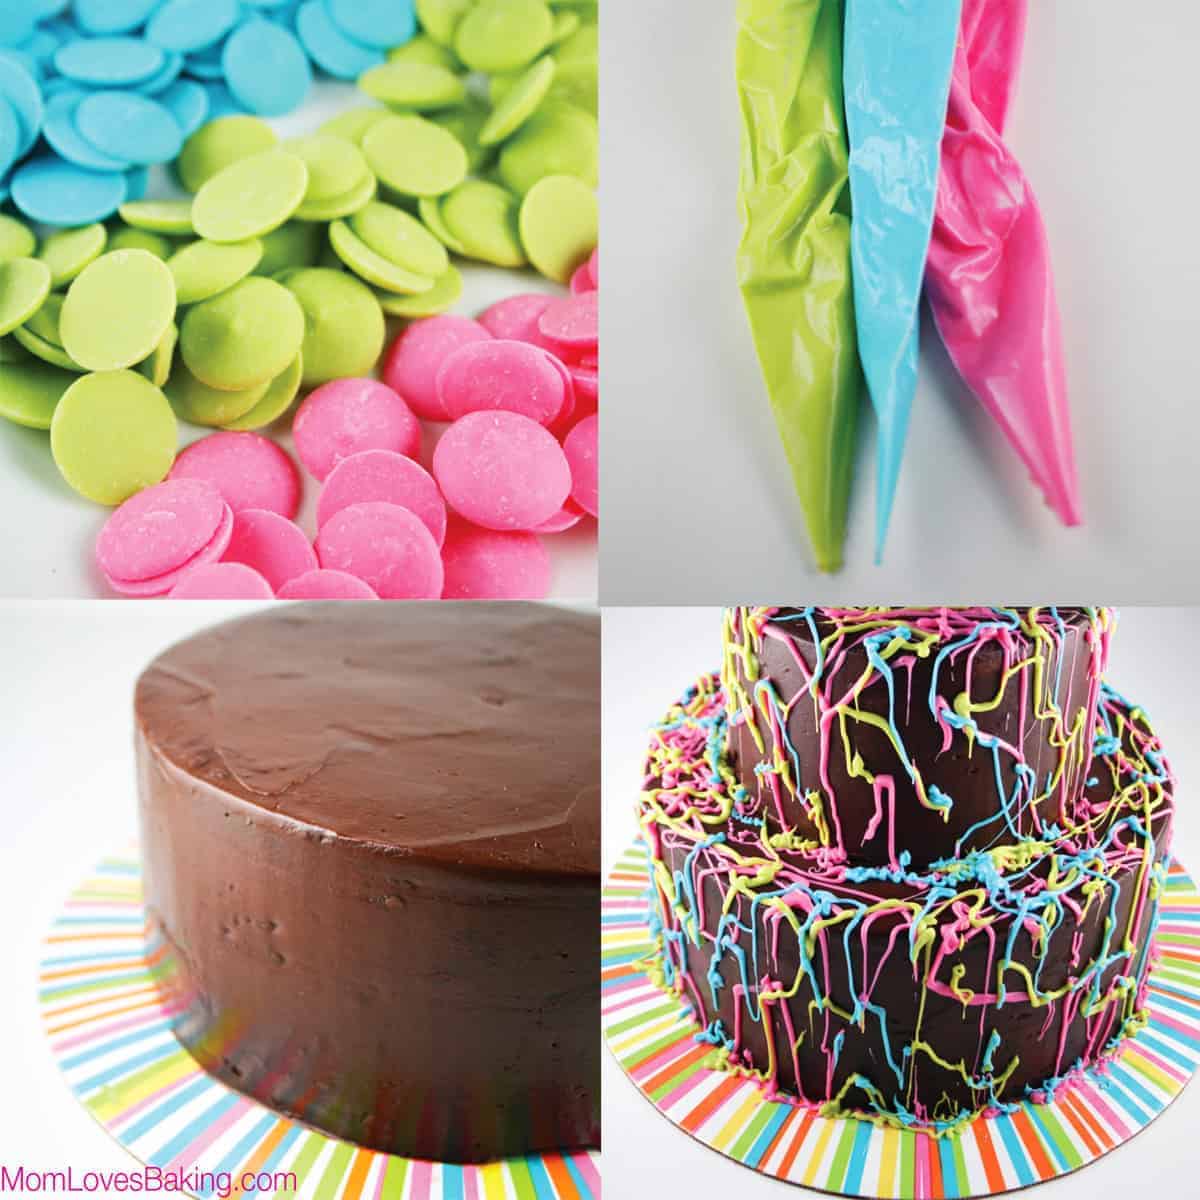
I used candy melts and clear plastic, disposable pastry bags (both made by Wilton) for the decorating part. Place a few handfuls of candy melts in each bag. Then place the filled bags (one at a time) in the microwave. Microwave on high for about a minute. Take it out and massage the bag gently to expedite the melting process. If it’s not completely melted, heat it a little longer. Cut a very small corner off the tip of the bag and pipe some melted candy onto the middle of the bottom tier. Then quickly and carefully stack your next tier on top. Repeat this process for the top tier, using the melted candy as your glue. Then pipe the melted candy on your frosted cake in a crazy pattern. I found that you have to move fairly quickly to get the desired effect. It’s sort of a calculated mess. Have fun with it! Let your inner artist shine through! Do as much of one color as you think looks good, then heat the next color. The candy melts will cool and harden very quickly, so you might have to reheat a little during the artistic process.
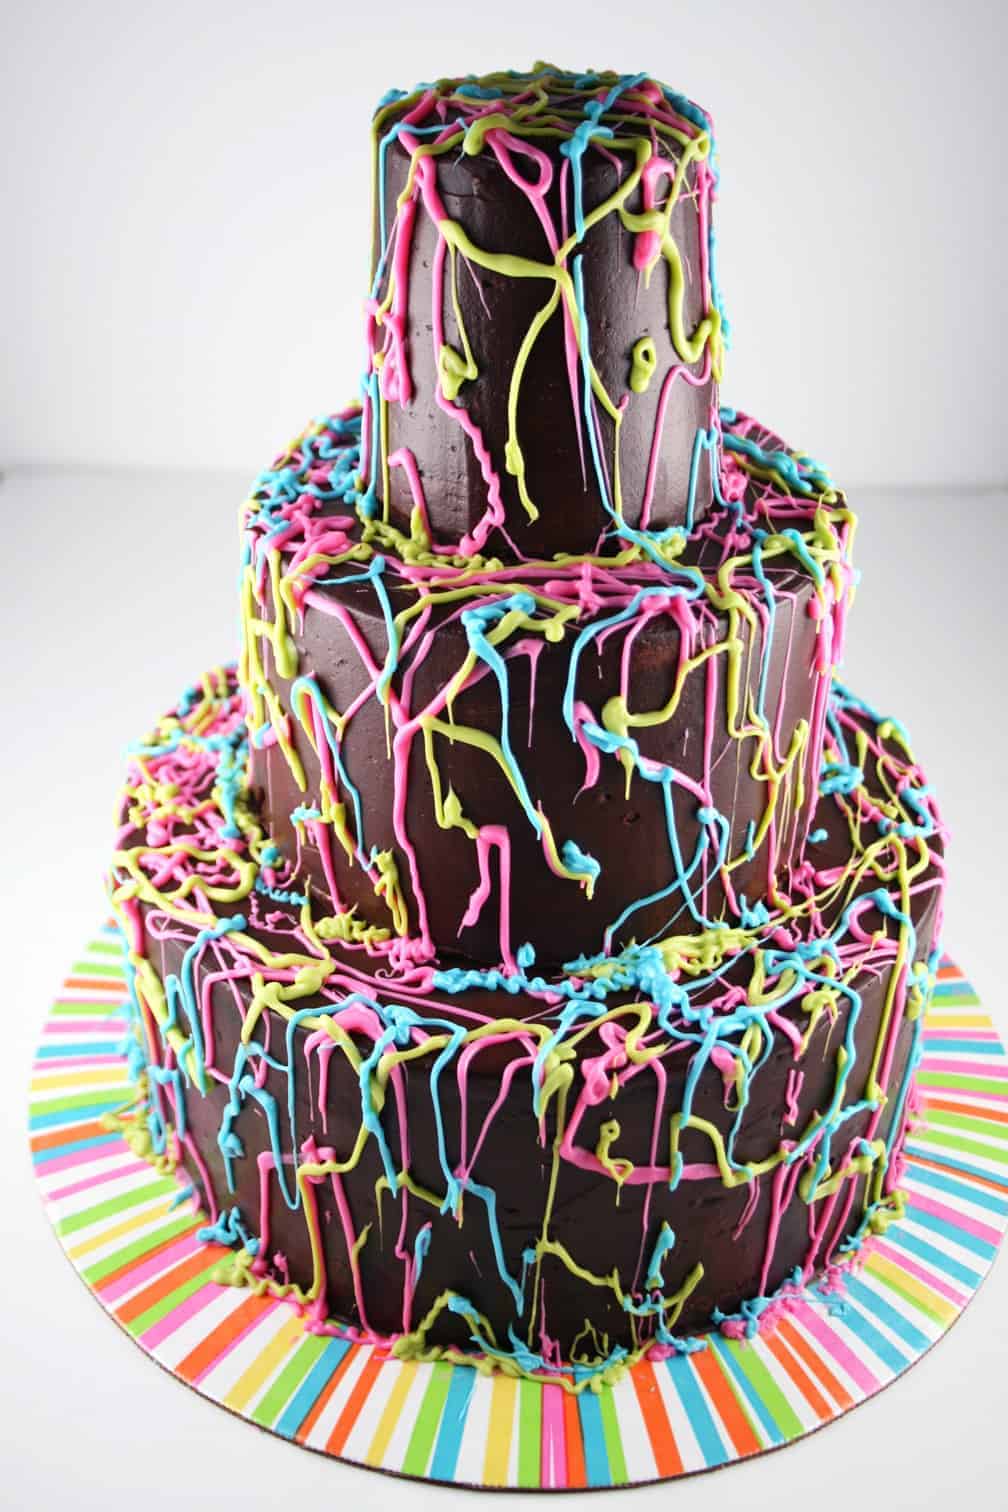
And here’s the finished product. Decorating the cake like this was so much fun. How wonderful do be able to create scribbles all over the cake and not worry about messing up. It is messy. That’s the whole idea.
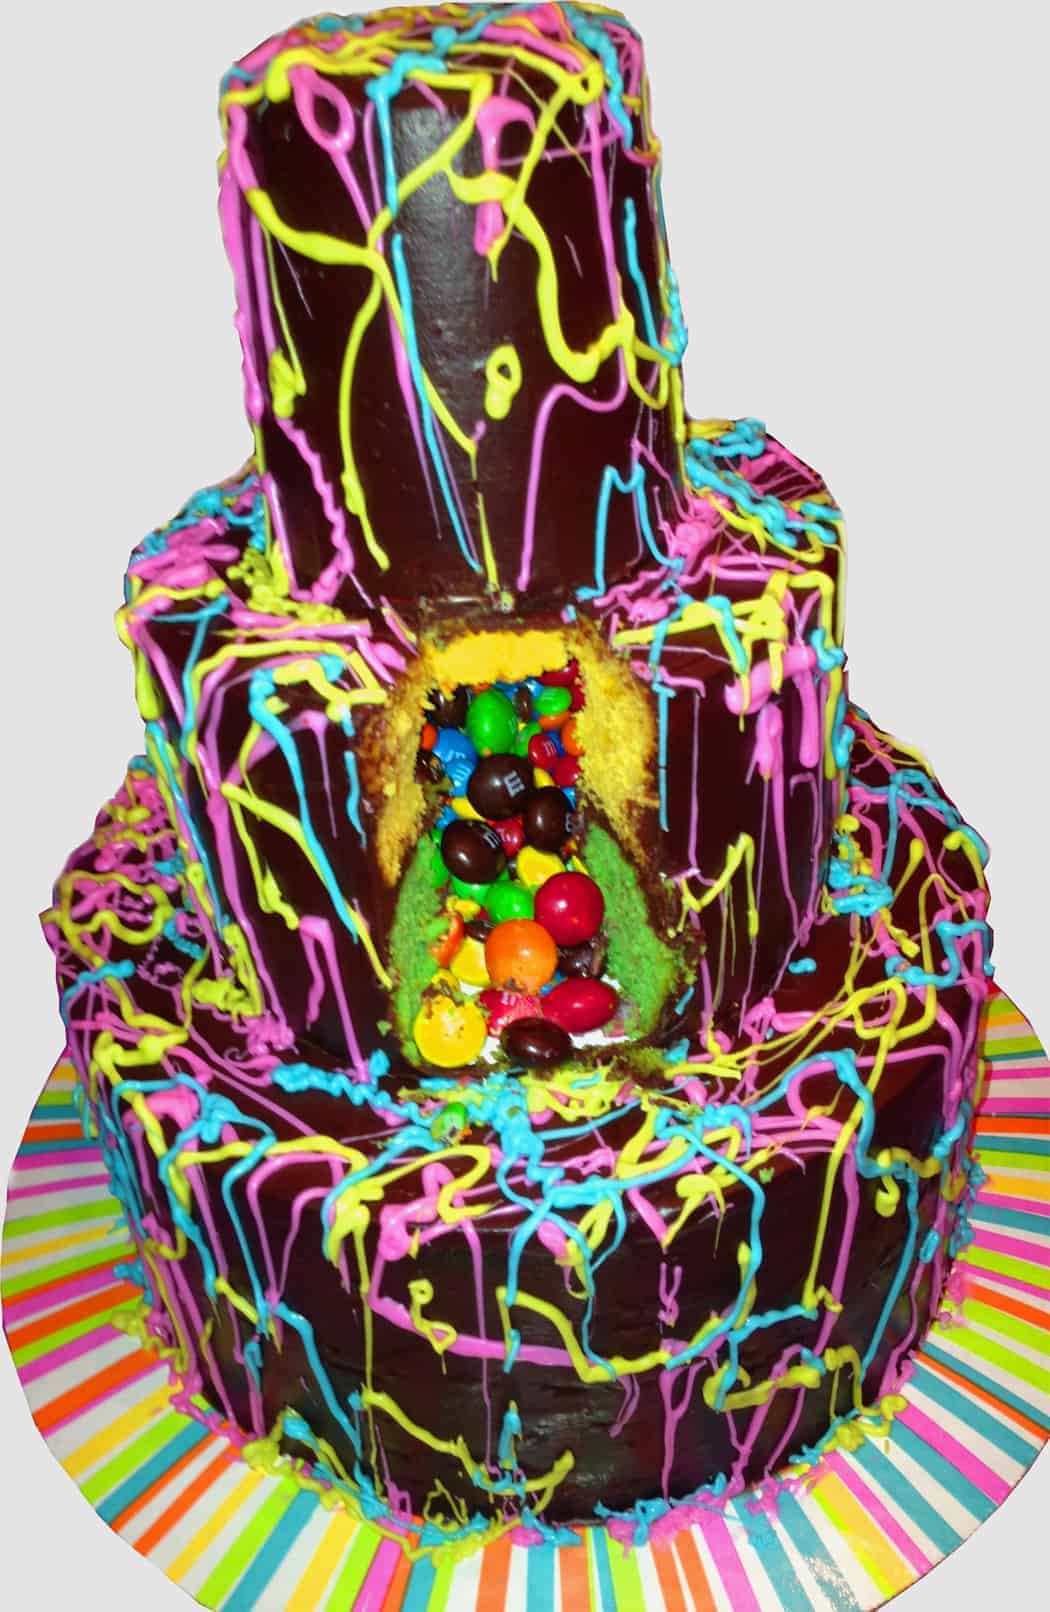
But cutting into the cake was definitely the best part of this cake adventure. The kids absolutely loved it! So much fun.
The Jackson Pollock Piñata cake was definitely a hit for my sweet girl’s birthday!
Jackson Pollock Piñata Cake
Ingredients
For the cake:
- 3 boxes white cake mix, prepared according to the package
- Food coloring: yellow, green, blue, purple, orange, red
- 24 ounces M&M candies
- 1 1/2 cups blue candy melts, such as Wilton
- 1 1/2 cups pink candy melts
- 1 1/2 cups green candy melts
- 3 12-inch disposable pastry bags (such as Wilton)
For the frosting:
- 20 ounces semisweet chocolate chips
- 2 cups sour cream, removed from refrigerator 1 hour ahead
Instructions
For the cake:
- Preheat oven to 350°F. Line cake pans with parchment and spray with cooking spray. You'll need 2 (3×1.5-inch) round pans, 2 (6×1.5-inch) round pans and 2 (9×1.5-inch) round cake pans.
- Decide what color each sized cake will be. You are making a total of 6 cakes. Use a scale to weigh the batter into 6 bowls. 6 ounces of batter per 3-inch pan, 18 ounces of batter per 6-inch pan and 41 ounces of batter per 9-inch pan. Weigh the batter accordingly into each bowl.Then add the food coloring and mix well. I did 6 ounces of yellow batter, 6 ounces of green batter, 18 ounces of blue batter, 18 ounces of purple batter, 41 ounces of red batter and 41 ounces of orange batter. Pour batter into the appropriate pans. Bake the cakes. The smallest cakes will take about 25 minutes. The 6-inch layers take about 45 minutes and the 9-inch layers take 50-60 minutes. You can test the middle to see if it’s done by inserting a toothpick. If it comes out clean, then it’s done. If not, stick it in for 5-10 minutes more.
- Let the cakes cool completely. Cover and refrigerate for 2 hours or over night. They’re easier to work with that way. Place the bottom (9-inch) layer on a 12-inch cake board. Cut a 4-inch circle in the middle of the cake, letting the knife go about halfway down. Scoop out the cake from the circle. Fill to the top with M&Ms. Set aside and make your chocolate frosting. Recipe follows. Spread frosting around the top edge of the cake. Take the second layer of cake and cut another 4-inch circle in the middle, this time going all the way through the cake. Remove the middle section from that layer and save it for later. Place that layer on top of the frosted layer. Pour more M&Ms inside the hole, filling it a little more than halfway. Replace the middle section that you removed, but cut it in half horizontally so that it will fit. Frost the entire cake and make it as smooth as possible. Repeat these steps for the next 2 tiers but make the hole in the middle slightly smaller. You can use a regular dinner plate for frosting the 6-inch tier and the 3-inch tier. After frosting all 3 tiers, let them chill in the refrigerator for several hours.
- Once they are chilled, place candy melts in pastry bags, one color per bag. Then place the filled bags (one at a time) in the microwave. Microwave on high for about a minute. Take it out and massage the bag gently to expedite the melting process. If it’s not completely melted, heat it a little longer. Cut a very small corner off the tip of the bag and pipe some melted candy onto the middle of the bottom (9-inch) tier. Then quickly and carefully stack your next tier on top. Use a large spatula to lift the cake up and onto the first tier. Repeat this process for the top tier, using the melted candy as your glue. Then pipe the melted candy on your frosted cake in a crazy pattern. I found that you have to move fairly quickly to get the desired effect. It’s sort of a calculated mess. Have fun with it! Let your inner artist shine through! Do as much of one color as you think looks good, then heat the next color. The candy melts will cool and harden very quickly, so you might have to reheat a little during the artistic process. Serve immediately or refrigerate until ready to serve.
For the frosting:
- Melt chocolate in the top of a double boiler with gently simmering water in the lower half of the double boiler. The water should not touch the top of the pot's bottom. Stir gently to encourage melting but not vigorously. As soon as chocolate is melted, remove from heat. Allow to cool until it is just warm to the touch.
- Fold in the sour cream with a large rubber spatula just until no white streaks of sour cream remain. The frosting will become overly thick with too much folding, but will remain silky if not overworked. If it becomes too stiff, you may warm it gently over a pot of warm water. It is best if used right away.
700504 541456 You really should take part in a contest for among the very best blogs on the internet. I will recommend this internet site! 995282
I want to make this cake 2 days in advance for my sons 10th birthday. I will be filling it with m&ms and I’m afraid the candy with lose colour or go soft ! What do you think . Also if it is refrigerated will it sweat when I take it out for the birthday? Thanks
1. How many days ahead can I make it? You can make the cake layers 2-3 days ahead. Just make sure you wrap them well in plastic wrap and store in the refrigerator.
2. Once it is done, does it have to be in the refrigerator? You can keep the cake at room temperature for 1-2 days, as long as it’s covered. It will last 3-5 days in the refrigerator in an airtight container.
3. I live in Costa Rica and we don’t have candy melts here (I looked for Wilton Candy Melts). Do you know if a product called Make ‘N Mold Flavored Melting Wafers will work? I haven’t heard of that brand. Maybe you could order the Wilton Candy Melts online. If not, you could use white chocolate chips. Melt them and add candy coloring which is oil based (not food coloring which is water based).
Hope that helps! 🙂
Hello, I hope you are doing great. I love your cake. It’s wonderful.
I hope you can help me with some questions that I have:
1. How many days ahead can I make it?
2. Once it is done, does it have to be in the refrigerator?
Thank you very much.
3. I live in Costa Rica and we don’t have candy melts here (I looked for Wilton Candy Melts). Do you know if a product called Make ‘N Mold Flavored Melting Wafers will work? Those are the only candies that I found here that look like the ones on your picture.
What a fun and festive cake! I’m sure your daughter was thrilled with it. Thanks for sharing! I