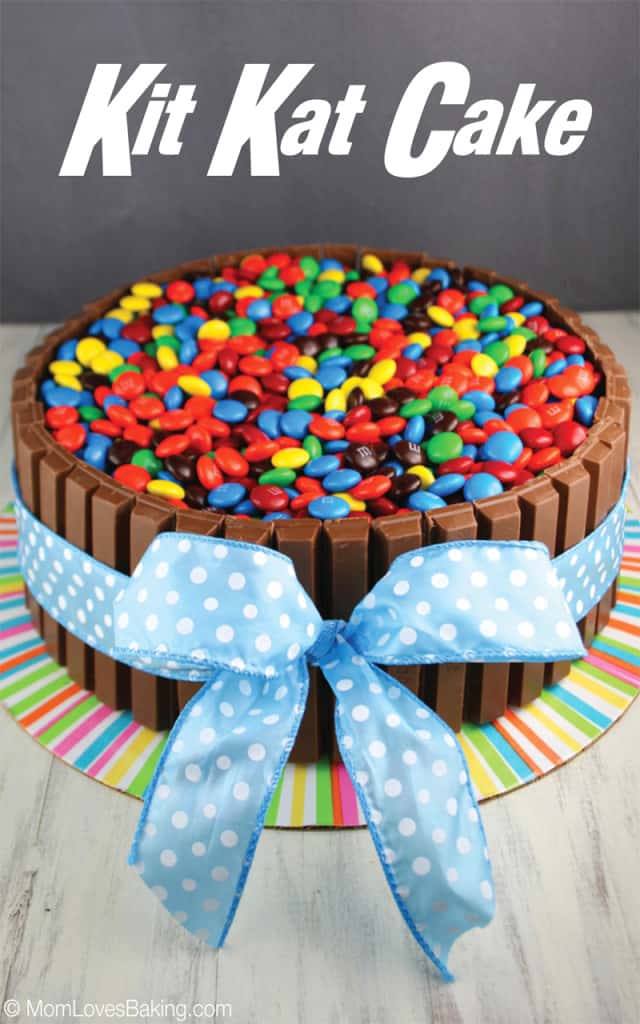
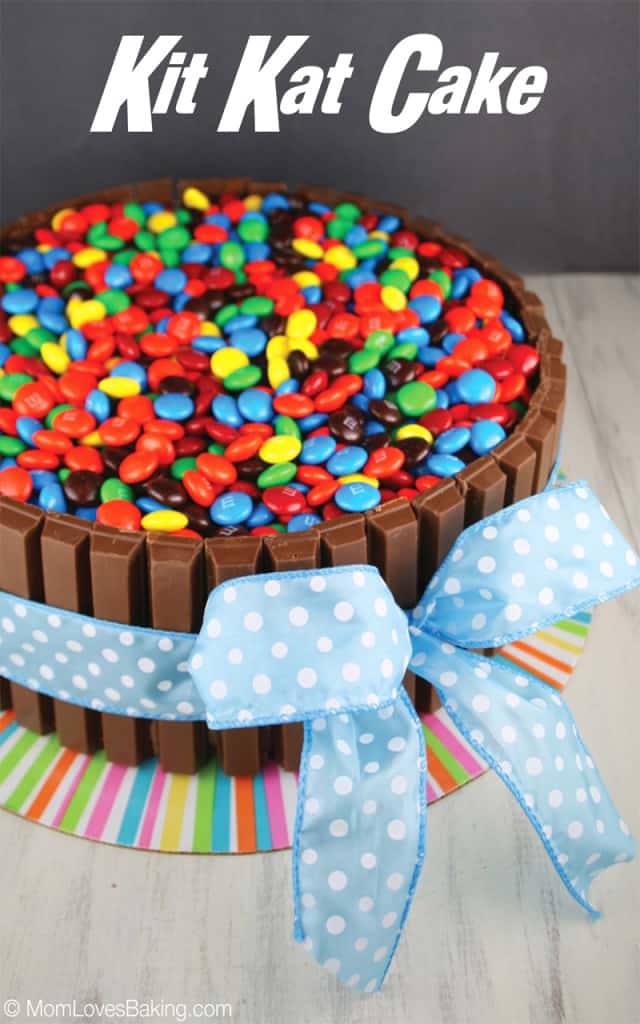
Buckets of M&M’s Kit Kat Birthday Cake Recipe
Impress your guests with this super fun Buckets of M&M’s Kit Kat Birthday Cake Recipe!
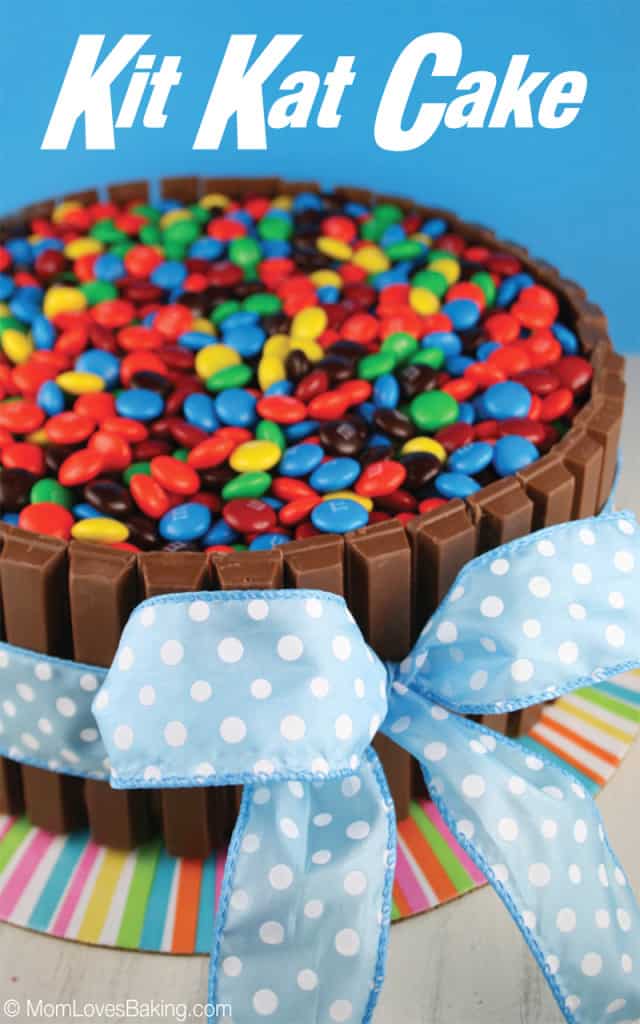
Create your edible bucket with Kit Kat candy bars around the sides of your cake, then add a ton of M&M’s on top.
The Best Kit Kat Birthday Cake Ever
I have been wanting to make this cake for the longest time. And I finally had the perfect occasion.
I was asked to donate a cake for a charity golf tournament over the weekend. The cake would be auctioned off to raise money for a young man named Trent Jones who was in an automobile accident and is now a quadriplegic. (Click here to learn more about his story and donate to his injury fund.)
WHY I LOVE THIS Kit Kat Cake Recipe
• Underneath all the candy is the most delicious chocolate cake with chocolate frosting!
• It also travels well. Since the frosting is covered by candy, it is easy to wrap it in clear plastic to hold it together until it reaches its destination.
• I have a thing for M&M’s. I love baking with them! They’re so colorful. And not to mention, super yummy!
• This Kit Kat Cake is such a fun party cake! It would be perfect for any holiday or next birthday party. It would be so cute using limited edition M&M’s for various holidays and adding coordinating ribbon colors. How cute would a Christmas Kit Kat Cake be? It’s a cake that all family members can enjoy!

INGREDIENTS NOTES
• Kit Kat Bars- Kit-Kat candy bars come in a wide variety of different flavors from just the regular kit kats. Feel free to play around with the different flavors! Unique flavors like lemon KitKat candy bars can be found at a specialty grocery store or World Market.
• Chocolate Frosting – I used Pillsbury store-bought for this recipe, but if you want to make homemade, try The Best Chocolate Buttercream Frosting recipe.
• Chocolate Cake Mix – Same goes for the cake batter. I used two boxes of 13.25 ounce each cake mixes but if you’d like to make a regular chocolate cake from scratch I have the best chocolate cake recipe right here; Chocolate Birthday Cake
• 8-inch Cake Pans – You can also use a square pan if that’s what you have on hand (but then it won’t look like a bucket, still cute though).

HOW TO MAKE A KIT KAT CANDY BAR CAKE
• Step 1 – Line cake pans with parchment paper
The first thing I always do when baking a cake is cut parchment paper to line the bottom. I simply place the pan on top of the article, trace the shape of the pan onto the paper with a permanent marker and cut it out. I cut about an ⅛” inside the line to make it fit perfectly. Then spray the pan with nonstick spray. Spray on the bottom and sides of the pan. Place the paper liner, then spray more on top of the liner. That baby will not be sticking to your pan. No way, no how!
• Step 2 – Bake the cake
Since this cake is sort of umm… EPIC, I thought it would be a good idea to use a cake mix. You know, to save some time. I used two 8-inch round cake pans and divided the batter from one cake mix equally between the two pans. Then baked them according to the package instructions.
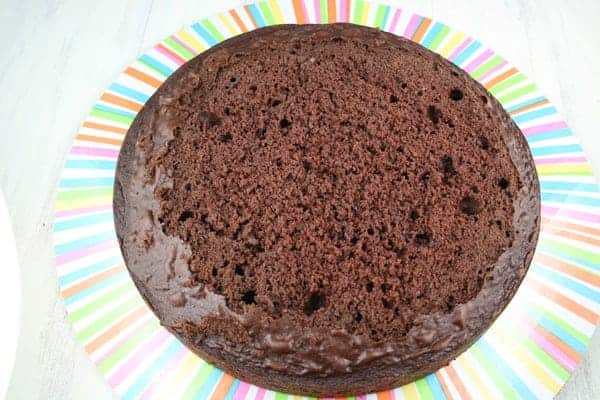
• Step 3 – Freeze the cakes
After the cakes are baked and cooled, cover them with plastic wrap and freeze them for about an hour. They’re easier to work with that way. Then they need to be leveled. Using a large bread knife, slice horizontally across the top of the cake, just so you can remove the dome-like shape.
• Step 4 – Frost the cake
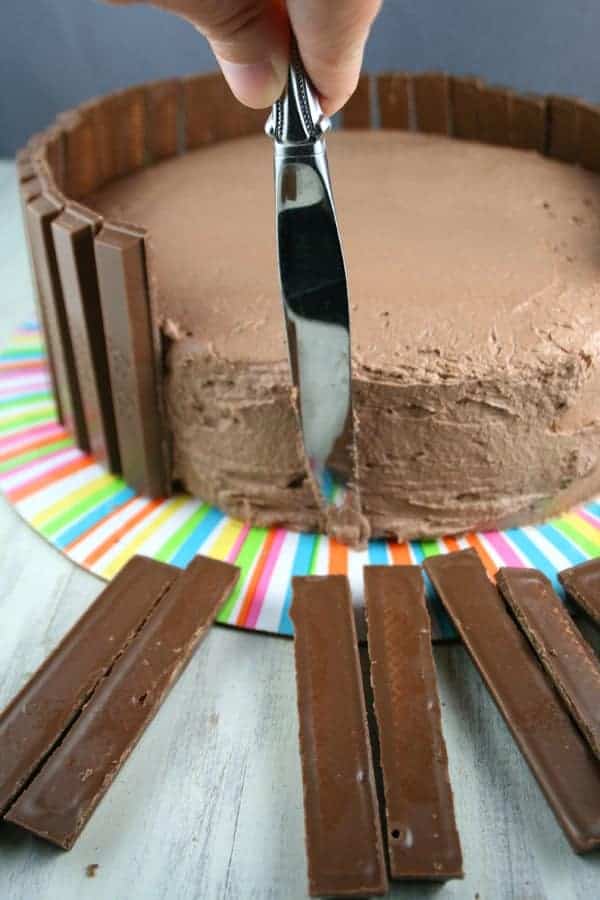
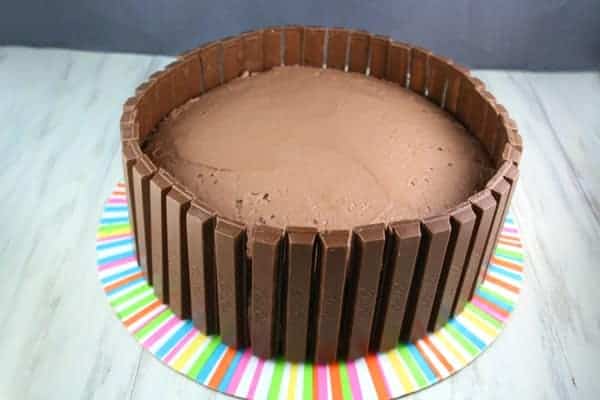
• Step 5 – Add the candy bars
Place one cake on a 12-inch cake board or large round plate. Frost the first layer, then add the second layer and spread frosting all over the layers of cake. After you unwrap all of the Kit-Kat bars (it takes a little bit of time, be patient), then you can start pressing them into the side of the cake. If the icing has formed a crust, then you will need to take a butter knife and rough up the edges a bit to get the candy bar to stick. Place the chocolate bars side by side, all the way around the sides of the cake until the outside of the cake is covered.
And voila! Your candy bar cake fence or bucket is complete. You should be left with about an inch and a half of vertical space to add your M&M’s.
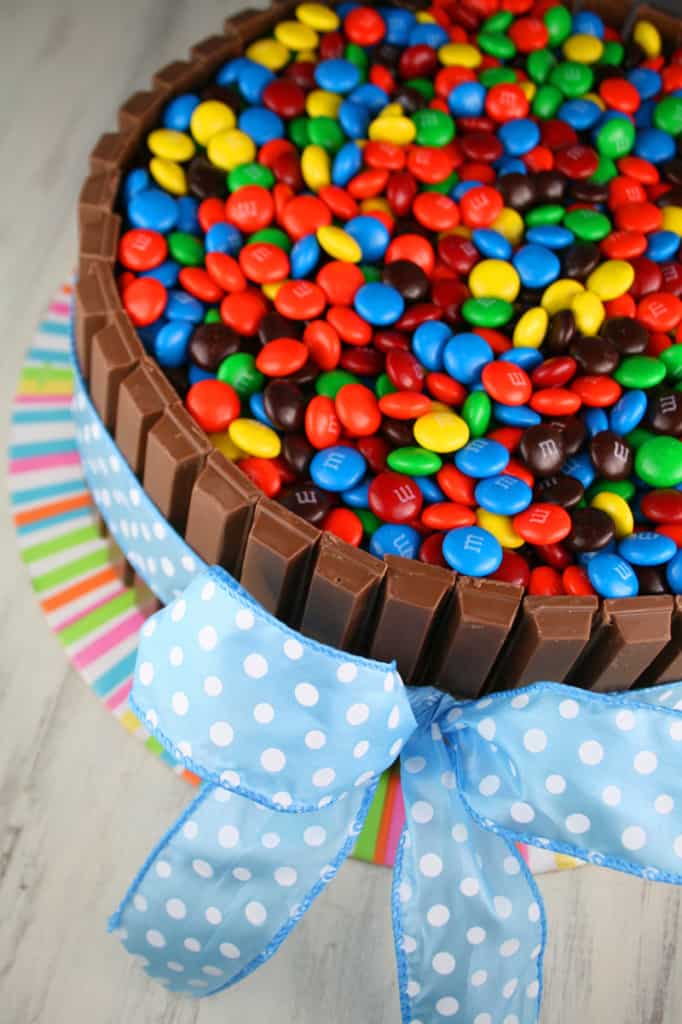
• Step 6 – Tie a ribbon around the cake, and add M&M’s
Before adding the M&M’s, carefully wrap a ribbon around the cake and tie in a bow. To measure the ribbon, I used a very technical method. I eyeballed it!
I used one large bag of M&M’s to fill the cake. The bag was 18 ounces.
EXPERT TIPS
• If you wanted to get fancy, you could color coordinate your ribbon and your M&M’s by going to the candy store and picking out your custom colors. For a baby girl shower, you could use pink ribbon and several shades of pink and white M&M’s. Of course, the M&M’s are more expensive that way.
• Alternative to the M&M’s, you could add chocolate chips, white chocolate or to be on the healthier side, add fresh fruit like fresh strawberries or blueberries for the filling!
• If you are having issues with the Kit Kats being too soft at room temperature, refrigerate them for an hour or so before use. Then use a sharp knife to break them apart to avoid breaking into Kit Kat pieces.
FREQUENTLY ASKED QUESTIONS
• How many Kit Kats will fit around the cake? I used about 11 Kit Kat bars or 42 sections for the entire cake.
• How to store? Keep in an airtight container. You can bake them 3 days ahead or even freeze them for up to 2 weeks.
• Looking for some more festive cake ideas for your next party? Here are some of my favorites…
Patriotic American Flag Layer Cake
Peek-A-Boo St. Patrick’s Day Cake
Rainbow Tie Dye Surprise Daisy Cake
Love this recipe? If you try it, be sure to tag me on @Instagram! You can also find me on Pinterest, YouTube and Facebook.
Kit Kat Candy Bar Cake
Ingredients
For the cake
- 2 boxes cake mix, prepared according to package instructions (such as Betty Crocker), 13.25 ounces each
For the frosting
- 2 cans chocolate fudge frosting, I used Pillsbury
For the decorations
- 11 1.5 ounce Kit Kat candy bars, you'll need 42 sticks total
- 1 bag M&M's, I used an 18 ounce bag
- 12 inch cake board
- 2 yards Ribbon of your choice, (I found mine at the dollar store)
Instructions
- Preheat oven to 350°F. Spray two 9-inch round cake pans with non-stick cooking spray. Line with pre-cut parchment paper (trace shape of pan onto paper and trim to fit in pan). Spray more cooking spray. Set aside.
- Prepare cake mixes according to package instructions. Fill prepared pans equally with cake batter. Bake according to package instructions. Let them cool. Then cover and put in freezer for 1 hour. You can skip this step, but the cake is much easier to handle when it is chilled and firm.
- Place chilled cake on cake board or large plate. Using a large bread knife, slice horizontally to remove the domed top of the cake, creating a flat surface. Frost top of cake. Level second cake and place on top. Frost all over top and sides of cakes.
- After unwrapping all of the candy bars, stick Kit Kat’s to the sides of the cake, lining them up vertically, side-by-side. If the frosting has formed a crust, just use a butter knife to spread it again, making it sticky. Wrap a bow around the cake, securing the Kit Kat’s. Fill the top of the cake with M&M’s. You should have about 1 1/2 inches of vertical space above the cake to add the M&M’s. You might have a few extra left over. I had about 1/2 cup left over.
- I think it’s best to keep the cake at room temperature because when the candy gets cold, it will sweat when you take it out of the refrigerator. Store covered for up to 3 days. Or if you must refrigerate, it will last a few days longer. Remove bow before cutting the cake.
Could you use like a whipped frosting? Or would it not hold the candy well?
My 8 year old granddaughter saw this cake and knew this is the one she wanted me to make for our family birthday celebration.
Question…I’m thinking if I baked the cake in 2-8″ pans that I probably wouldn’t need as many M&M’s to fill the top. Your thoughts?
Perhaps not as many, but I would buy a big bag just in case.
Could I freeze the cake with all the candy? I want to make ahead.
Thanks!
You could make the cake and frost it, then freeze. But don’t freeze with the candy because the chocolate candy doesn’t do well in the freezer.
Hi, could you put the kit kats on 24 hours before serving or will they go soft? Looks great!
You could, but I wouldn’t put it in the refrigerator with the kit kats on it because they might sweat.
The best cake I made for one of my grandsons……he absolutely loved it, as did all that attended the party! It was delicious, fun, and a big hit!
Now…he has asked me this year to make him a SNICKERS cake…..but he wants it exactly like the KitKat cake but with his “new “ favorite candy….lol
Any advice on how to do this?
This cake was the easiest birthday I’ve made! Thank you so much for the idea!!! Everyone LOVED it!
Hi Nicole, Yay! I’m so happy to hear. Did you take a photo? If so, tag me on Instagram #momlovesbaking and happy baking!
I made it. Kit Kats were plenty long enough. Took quite a bit of m & m’s to fill it, but it looks lovely. Wasn’t able to attach a picture.
Kathy: Yay! So glad you made it and that it looks lovely. I’d love to share your photo. Are you on Instagram? If you tag @momlovesbaking on Instagram, then I will share it. :-))
How much people does it serve
14-16 cake slices.
Do kit Kat come in longer size? How are they tall enough for a two layer cake with room for candy on top?!
No, the cake layers are very thick.
How are kit Kats tall enough for a two layer cake with room for candy on top?! Are they sold in two sizes?
I made this for my son’s 16th birthday and it was AWESOME!! I didn’t use as many kitkats or m&m’s as the recipie but it was still ?!content://media/external/file/13591
I made this for my son’s 16th birthday and it was AWESOME!! I didn’t use as many kitkats or m&m’s as the recipie but it was still ?!
Yay! So glad it was awesome! Enjoy!