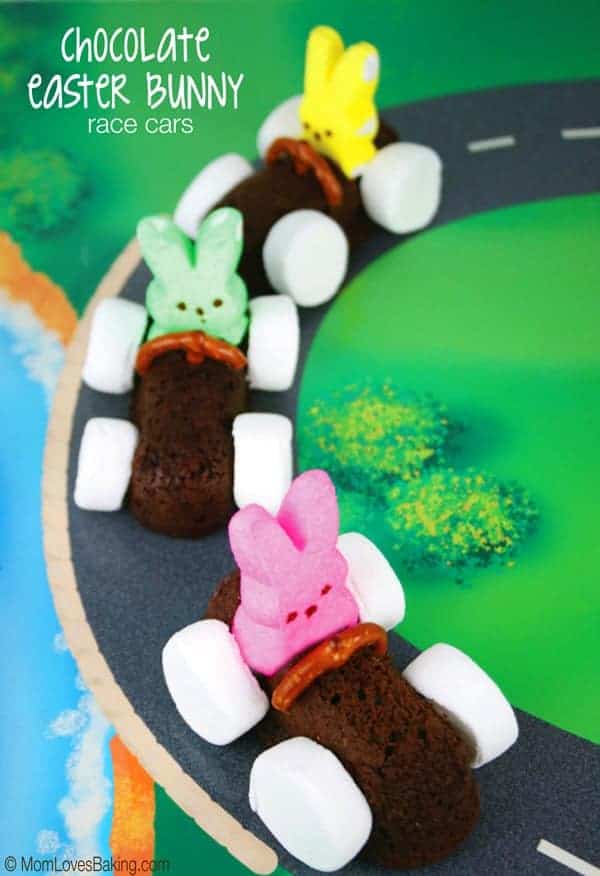
Peep Bunny Cars with the Best Homemade Twinkies
Peep Bunny Cars with the best Homemade Twinkies – The cutest homemade Twinkie cakes with creamy filling!
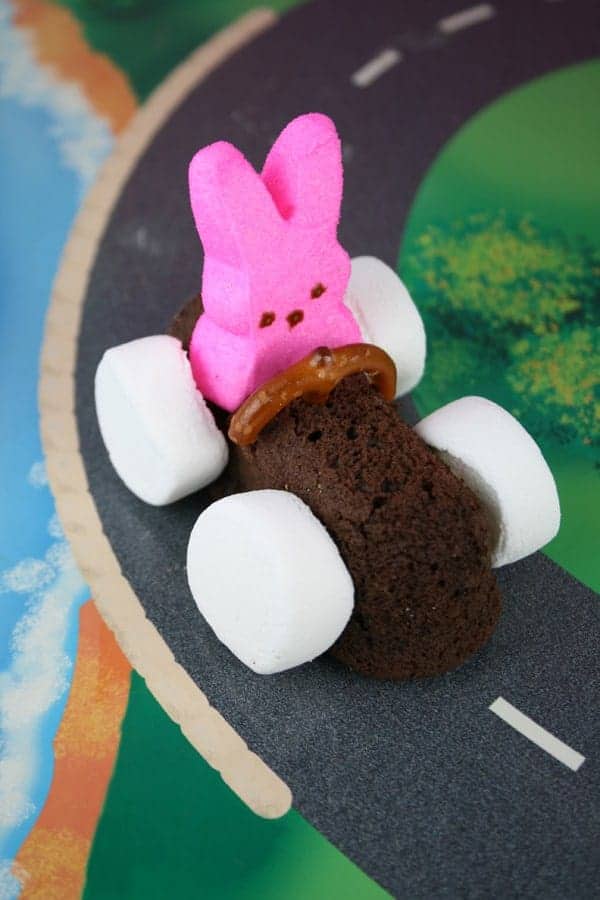
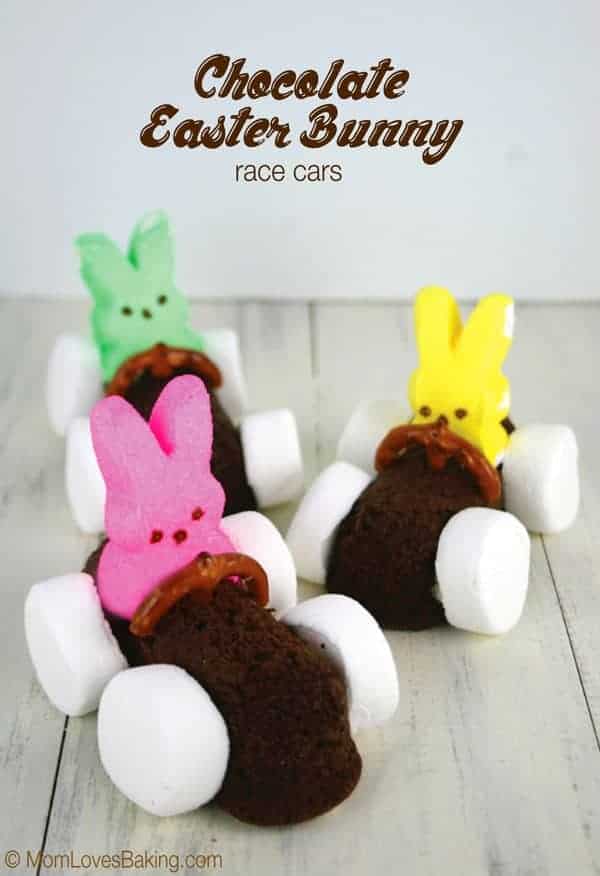
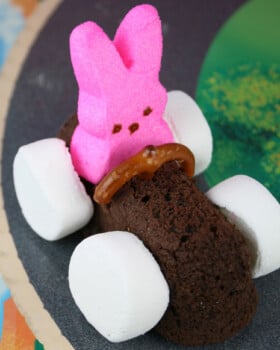
Decorated with bunny PEEPS, pretzel steering wheels and marshmallow tires.
Bunny Car Twinkies Cake Recipe
Hosting an Easter party this year? These Peep Bunny Cars with Homemade Twinkies will make for an unforgettable addition to your dessert table.
Why I love these
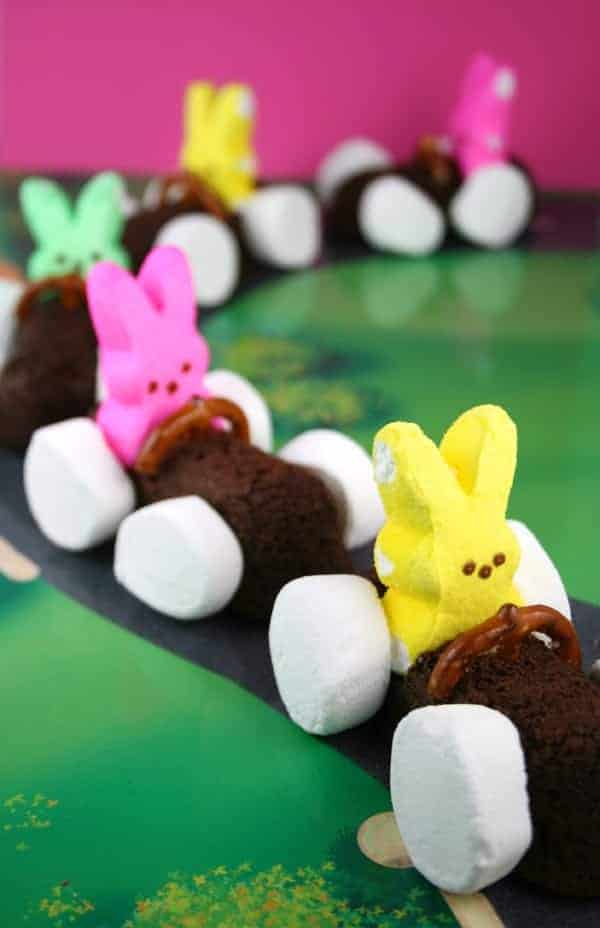
• These Chocolate Bunny Race Cars are not only cute but they are moist and yummy to eat.
• We used a chocolate cake mix for the “cars” and filled them with vanilla buttercream.
• They have bunny PEEPS! They’re so colorful. I just love them.
• Kids love these fun cake bunny cars! Perfect for Easter!
• This simple dessert is a fun way to get kids in the kitchen.
• If you love Twinkies, then you will love this homemade Twinkie cake recipe even more! Also similar to the Ho Ho snack cake.
What you need
Ingredient Notes
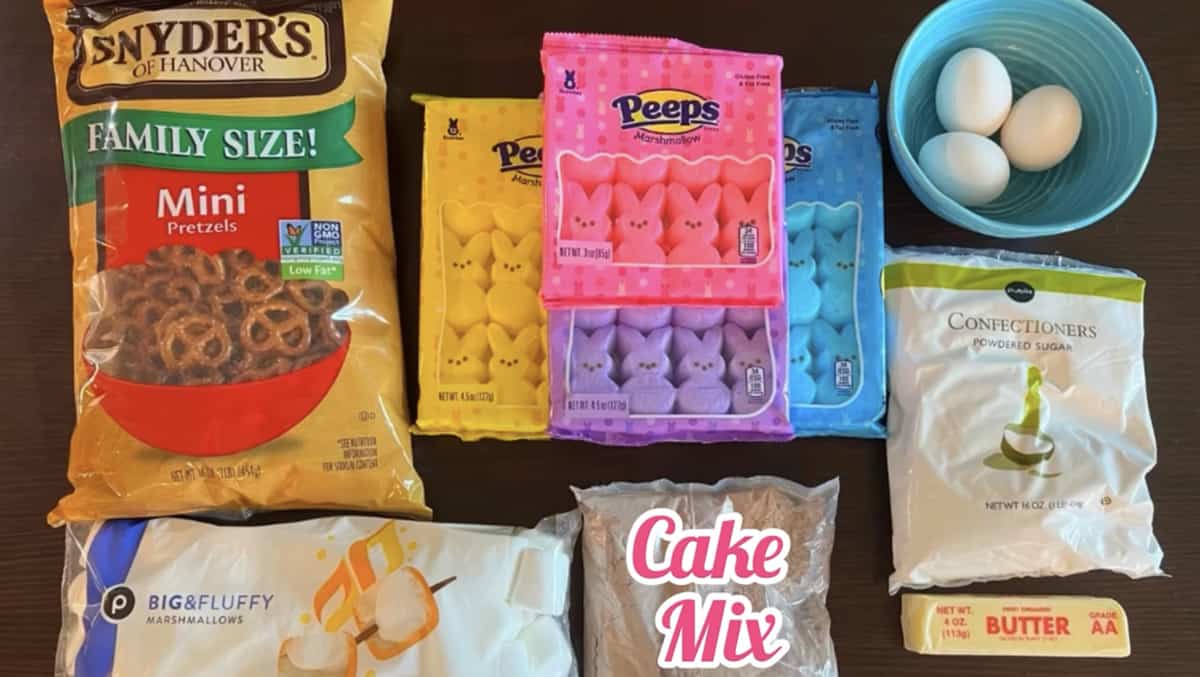
Cake Mix – We used a chocolate cake mix for this Twinkie cake recipe. You could also use a yellow cake mix. Choose your favorite brand. We used Pillsbury. For a strawberry Twinkie cake, try strawberry cake mix.
Buttercream Frosting – For the vanilla cream filling, we used homemade buttercream frosting. Full recipe is below.
Peeps – These adorable bunny shaped marshmallows in colored sugar are readily available at most grocery stores during the Easter season. You can find them online if it’s off season.
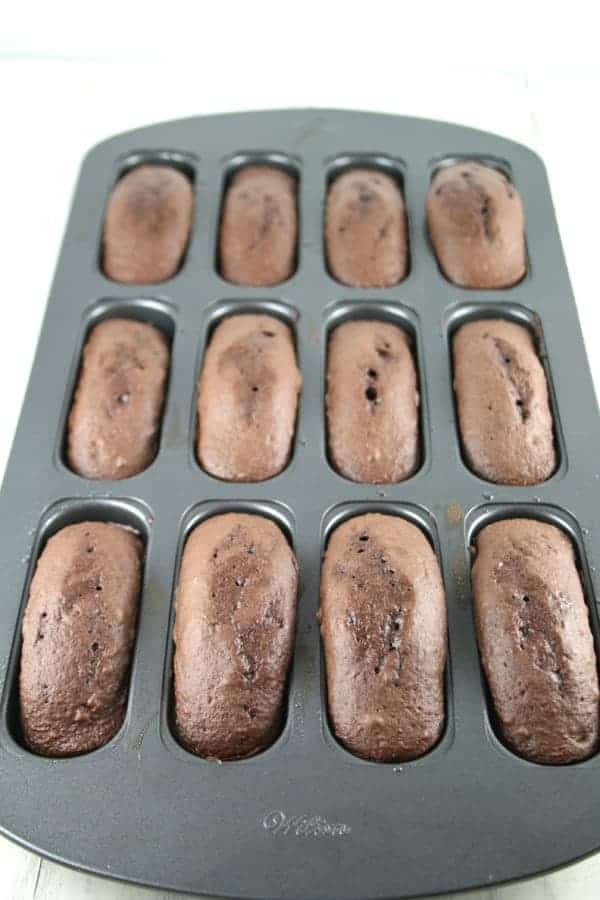
Twinkies Pan – You’ll need a Hostess Twinkie cake pan to make homemade Twinkies. My pan is made by Wilton and I found it at Joann Fabrics. You can also find the Twinkies pan on Amazon so you can make these beloved Hostess snack cakes. Homemade versions are always best!
How to make homemade Hostess Twinkies
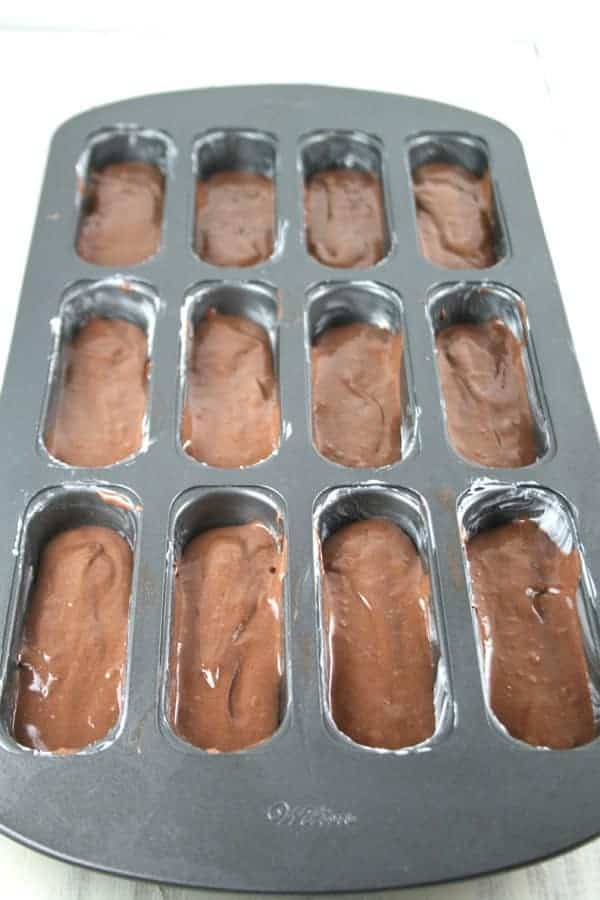
1) First you whip up a box mix in a large mixing bowl (prepared according to package instructions). Spray the pan with nonstick cooking spray and fill the cavities about halfway with cake batter. You don’t want it too full or they will puff up too much. Bake at 350°F. for 20 minutes. Let cool on a cooling rack.
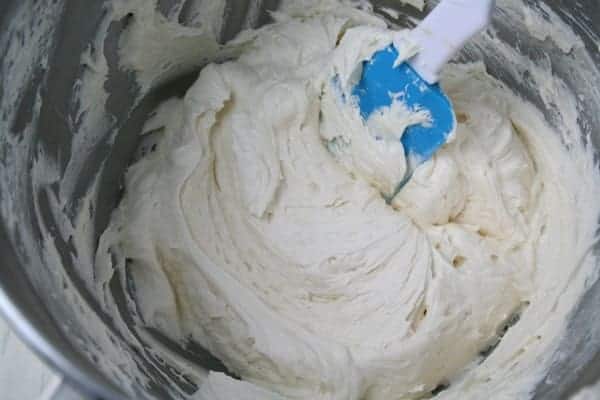
2) In a medium bowl, make your Twinkie filling using a hand mixer. We used my favorite buttercream recipe which is just unsalted butter (room temperature), confectioners’ sugar, cream and vanilla extract.
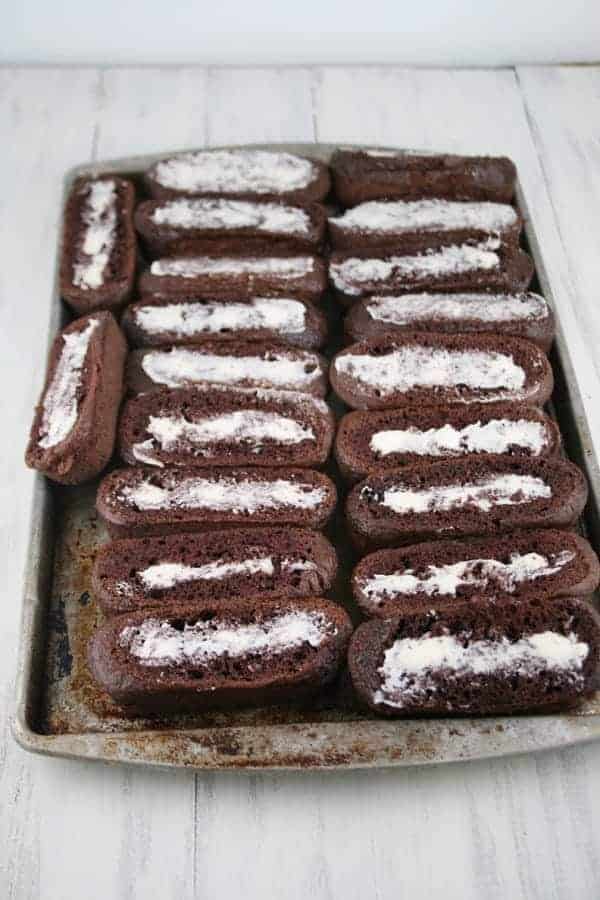
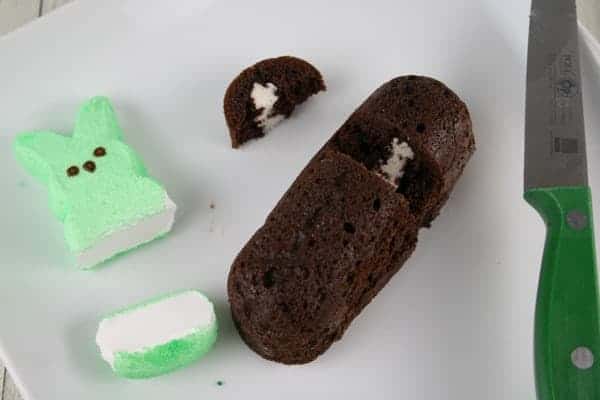
3) Once the cakes are cooled, then you can trim them and fill them. You’ll use a toothpick to create 3 little holes in the bottom of each Twinkie. Then pipe the frosting into the 3 holes using a piping bag or pastry bag fitted with a #21 pastry tip.
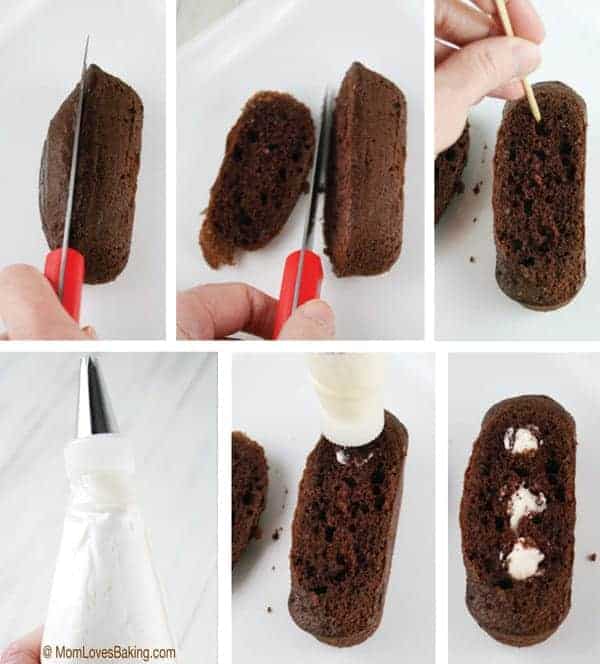
4) Use a butter knife to smooth the frosting, then place the cakes in the refrigerator to chill for about an hour. They’re much easier to work with when they are firm, so don’t skip this step.
How to make Bunny Car Cakes
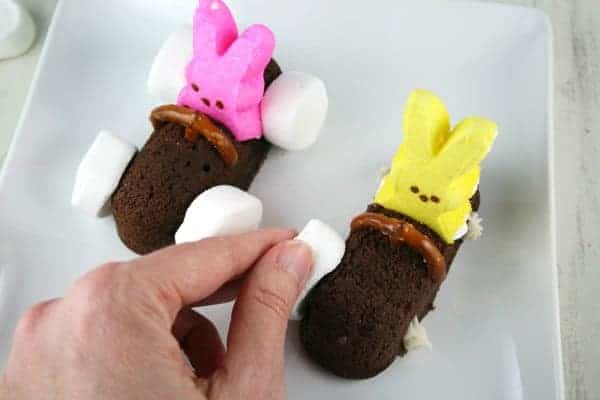
1) Take the cakes out of the fridge and cut a small section out to create a seat for your bunny driver. Put a little icing in the seat before placing the Peep.
2) Next, take the Peeps out of the package and separate them. You’ll be cutting the bottoms off of the Peeps like so.
3) For the wheels: Cut marshmallows in half. Use icing to glue them onto car.
4) For the steering wheel: Break the pretzels in half and stick in cake. Place them in the refrigerator for about 30 minutes before serving.
Expert Tips
• Room Temperature Ingredients – For best results, always use room temperature ingredients for most baking projects. Chilled ingredients mix differently and affect the consistency of the recipe.
• Prepared Pan – It’s very important to grease your Twinkie pan very well to make sure your cone cakes don’t stick. Use shortening, butter or nonstick spray generously in Twinkie pan before filling with batter.
• In a hurry? Use store bought Twinkies instead of the homemade ones. Follow the same instructions above on assembling the bunny car cakes.

Frequently Asked Questions
• What is the best chocolate cake mix at the supermarket? According to the internet, Betty Crocker Delights Super Moist Triple Chocolate Fudge. Based on the name alone you might think this cake would be chocolate overload, but it’s just right.
• What does adding instant pudding mix to a cake mix do? Adding a small box of instant vanilla pudding in with the cake mix (don’t make the pudding) adds additional flavor, moistness, and a denser texture.
• What Are Peeps Made Of? Making Peeps only requires three ingredients: sugar, corn syrup and gelatin.
What are your favorite Easter Memories?
I have such fond memories of Easter. My grandmother would buy me a fancy dress and take me to church. I don’t remember going on an Easter egg hunt but I do remember getting a basket of candy that would always include a big chocolate bunny.
If you celebrate Easter, what are your childhood memories of this special holiday? Let me know in the comments below.
Happy Easter!
Lise
xo
An Easter bible verse…
“God so loved the world that he gave his only Son, so that everyone who believes in him won’t perish but will have eternal life.” – John 3:16
Looking for more Easy Easter Desserts? Here are some of my favorites from the website:
• Chocolate Ding Dong Cake with Cute Birds Nest
• PEEPS Sunflower Brownie Cake
• Best Lemon Cake from Scratch
• Easy Strawberry Cool Whip Pie
• Easter Dirt Cake from Lil Luna
related recipes
Love this recipe? If you try it, be sure to tag me on @Instagram! You can also find me on Pinterest, YouTube and Facebook.
Peep Bunny Cars with the Best Homemade Twinkies
Ingredients
For the cakes
- 1 box chocolate cake mix, prepared according to package instructions, (15.25 oz/432g)
- 20 bunny shaped marshmallow Peeps®
- 40 large marshmallows, cut in half
- 20 small pretzels
For the buttercream frosting
- 1/2 cup unsalted butter, softened, (113g)
- 2 cups powdered sugar, (226g)
- 2-3 tablespoons heavy cream
- 1 teaspoon vanilla extract
Equipment
Instructions
For the cakes
- Preheat oven to 350°F. Whip up the chocolate cake mix (prepared according to package instructions). Spray the pan with non-stick cooking spray and fill the cavities about halfway. You don’t want it too full or they will puff up too much. Bake at 350°F. for 20 minutes. Let them cool completely, about 30 minutes. Repeat process with remaining batter, if needed.
For the buttercream
- Meanwhile, make your frosting. Beat softened butter on medium speed with an electric or stand mixer. Beat for 3 minutes until smooth and creamy. Add powdered sugar, cream, and vanilla extract with the mixer running. Increase to high speed and beat for 3 minutes. Add more powdered sugar if frosting is too thin or more cream if mixture is too thick.
Making the bunny race cars
- Once the cakes are cooled, trim off the bottoms (see photo). Use a toothpick to create 3 little holes in the bottom of the cake (don’t press down too far though, you don’t want it to go all the way through the cake). Then pipe the frosting into the 3 holes using a pastry bag fitted with a #21 pastry tip.
- Use a butter knife to smooth the frosting, then place the cakes in the refrigerator to chill for about an hour. They’re much easier to work with when they are firm, so don’t skip this step.
- Next, take the Peeps out of the package and separate them. Cut the bottoms off of the Peeps (about 3/8″). Take the cakes out of the fridge and cut a small section out to create a seat for your bunny driver. Put a little icing in the seat before placing the Peep. Cut marshmallows in half. Use icing to glue them onto car. Break the pretzels in half and stick in cake for the steering wheel.
- Place in refrigerator to set for about 30 minutes before serving. Store covered in refrigerator for up to 3 days.
Video
Notes
Did you make this recipe?
Please let us know by leaving a star rating and review!They were a big hit at my son’s 3rd grade class today. I also made a batch for his cub scouts annual banquet dinner last weekend. There was a baking contest which I entered. There were a lot of tough competitors though and alas, I didn’t win the prize which was a miniature wooden oven trophy, but I believe I won the hearts of many of the children in attendance. One little girl in particular had such a priceless look on her face when she finally got to taste her very own bunny race car. Her eyes were opened wide and she had a big smile on her face. That was the best award of all!
These are so darn cute! I really need that Twinkie pan–my family loves all those Hostess products plus then I can make these adorable race cars!!
They taste better than the actual Twinkies too. LOL!